This guide details Concep’s advised steps to create a GDPR compliant workflow on Concep Send. For further tips on GPDR from Concep, please visit LoveGDPR.com.
Please note, this is not an exhaustive guide and further processes will be required for your firm to become completely GDPR compliant.
Getting Consent From Existing Contacts
To get consent for your existing contacts, you can insert a link into a campaign that will allow your recipients to confirm that they want to receive marketing communications. This is a mail merge that will display either a link to confirm the contact if the recipient is not currently confirmed, or a message to notify the recipient that their email address has been confirmed as wanting to receive marketing material.
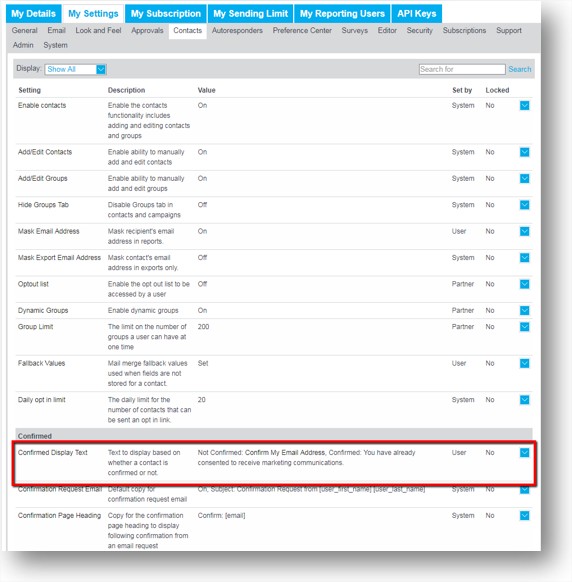
Go to Settings, and then select Contacts, and under Confirmed, select Confirmed Display Text.
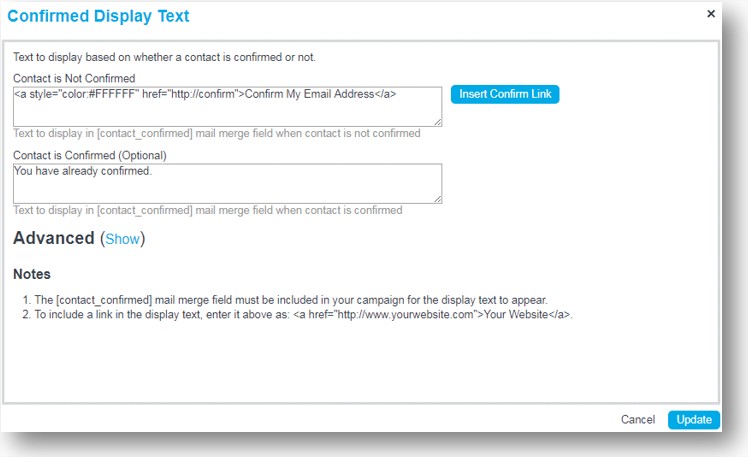
Once you have selected this, you have to select what is displayed when the mail merge is inserted into your campaign. For a contact that isn’t confirmed, click Insert Confirm Link, to create the link required for the recipient to confirm their email address. You can change the text that is displayed between the <a> tags.
For a contact that is already confirmed, you can select text that will display to notify them that they don’t need to action anything.
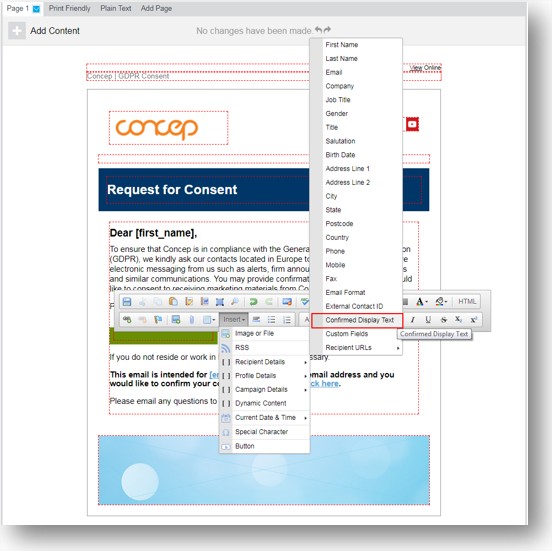
You can then insert this into a campaign. In the editor toolbar, click Insert, and then hover over Recipient Details, and then select Confirmed Display Text.
 Getting Consent From New Contacts
To get consent from new contacts, create a sign up form similar to your previous survey to be distributed on your website, either as a link, or embedded within. Again, use three free text questions for First Name, Last Name and Email Address. For the Email Address, this needs to restrict the answer to an email address, and select to Confirm Email Address. This will create a double opt in, which will send a campaign to the recipient, selecting for them to confirm that they consented to receiving marketing.
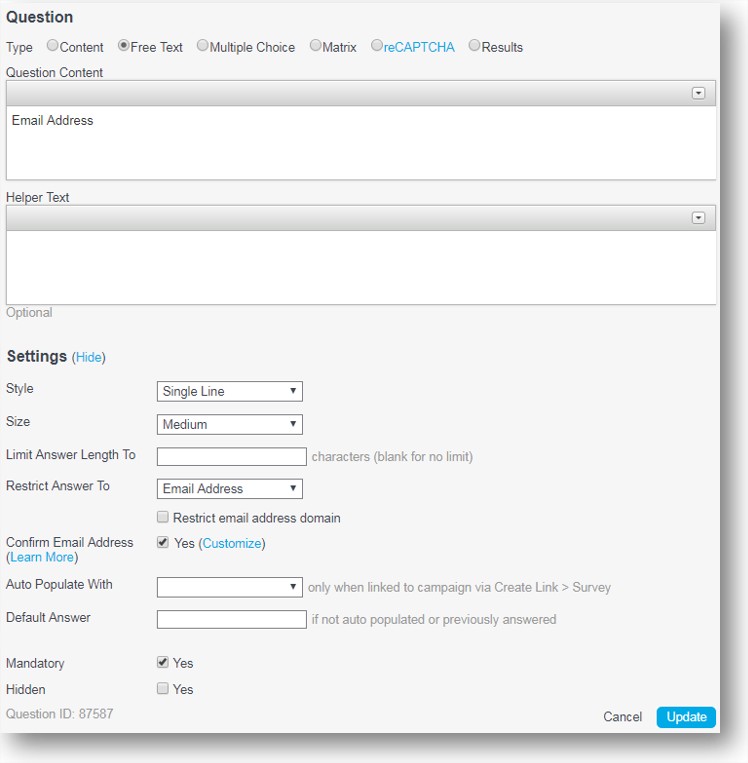
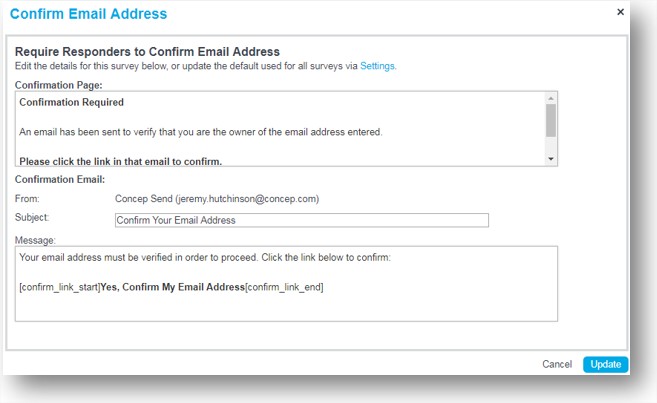
You can customise what is written on the confirmation campaign by clicking Customize.
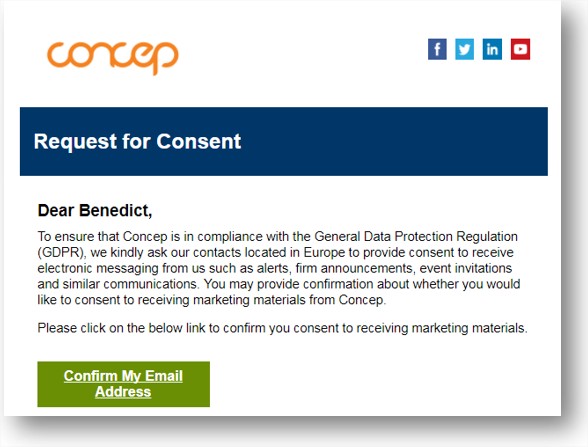
When the responder has completed the survey, they will then receive a campaign in their inbox similar to the one below.
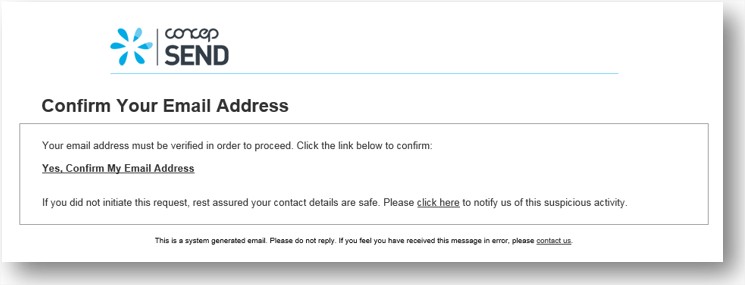
Once the responder clicks on the link, they will be taken to the confirmation page of your survey, and their contact will be added into Send as a confirmed contact.
If you’d like to learn more about confirming your contacts, click here.
Comments
0 comments
Please sign in to leave a comment.