
A Send Account is used to author and send email campaigns. These can be assigned to individual CRM users for marketing functionality within the system, or simply linked to enable integration of its activity data.
If you'd like to give an existing account admin rights, please follow the steps in this article.
Prerequisites
- Email Marketing Administrator security role assigned to your Microsoft Dynamics CRM user.
Steps
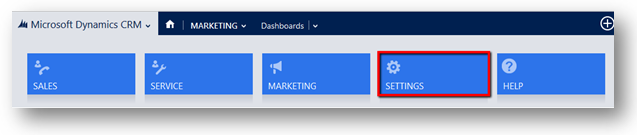
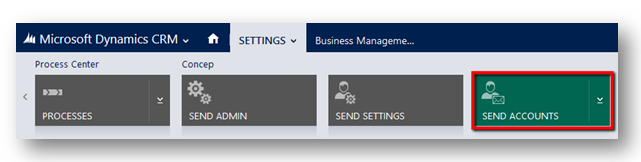
1. In your Microsoft Dynamics CRM, open the main menu and click on the Settings button. The page will reload and the blue navigation bar will be updated with the Section name. Click on Settings and a new menu will open. Then scroll to the right hand side until the Send Account button appears. Click on it.
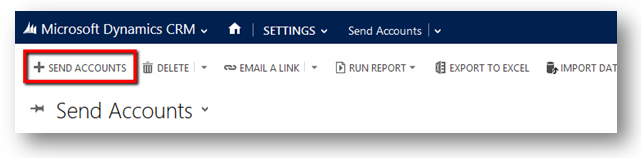
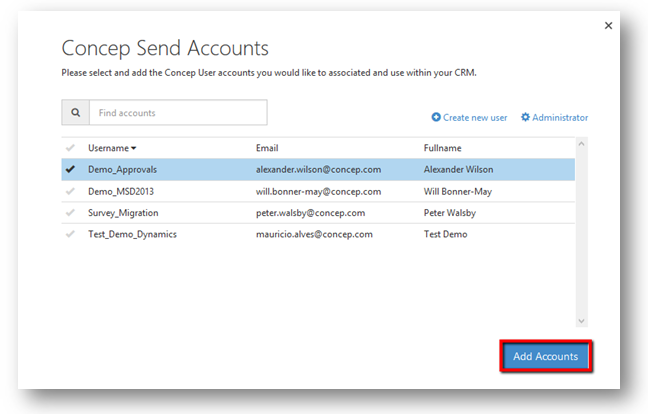
2. At the Send Account page click on the ‘+ Send Accounts’ button.
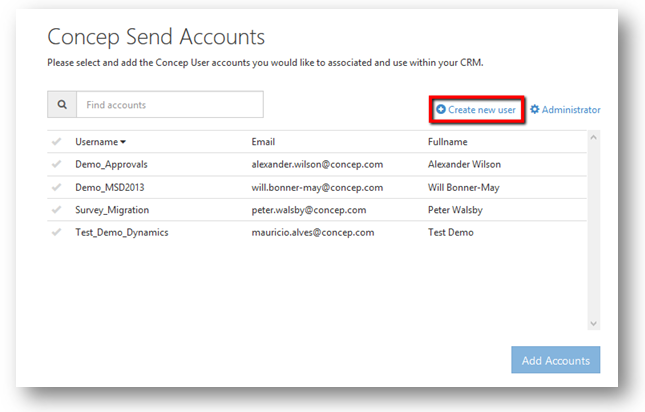
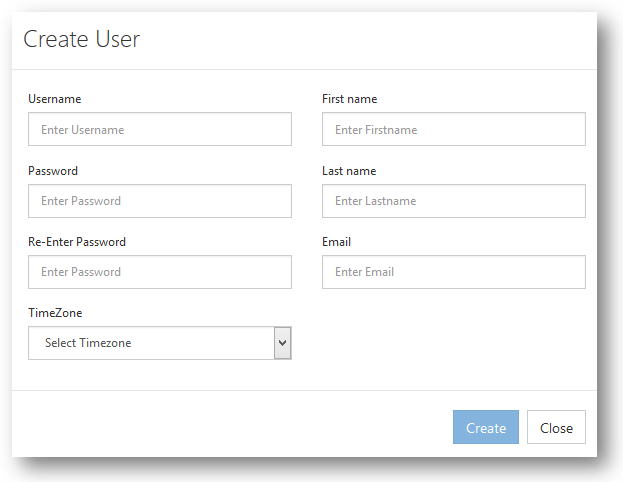
3. A pop up will load with a list of all your Send users that haven’t been integrated yet. Click on “Create new user” to create a new Send user.
4. Fill up the information required on the form and when you finish click on Create. See Send user creation best practices below.
Best Practices:
- Decide your company’s name convention for usernames. It helps to keep the data organized and easier to find.
- If this Send user is expect to be an approver (check Approvals for more information), the e-mail address should be the same as the Dynamics user which will hold this Send user.
5. The pop up will reload and your new Send user will be listed among all non-integrated users. Select the Send user you want to create in your Microsoft Dynamics CRM and click on Add Accounts.
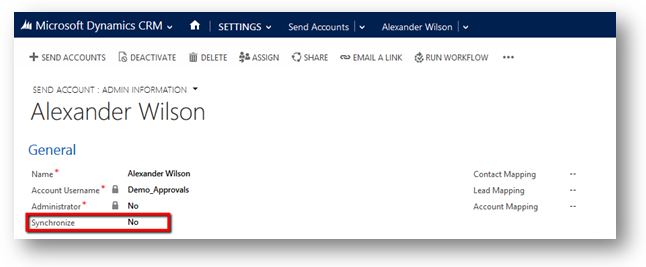
6. The pop up will close and the Send Account page will automatically refresh with your new Send Account in it. Double-click on your new Send Account to open it. If you expect to have the e-mail campaigns and surveys created with this account synchronized back into your CRM, change the “Synchronize” field to “Yes”.
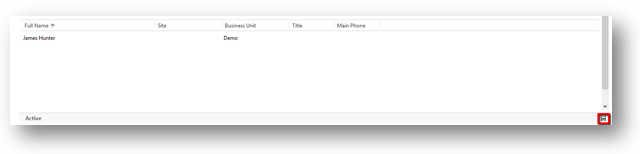
7. Go to the bottom of the page and click on the plus sign at the right hand side. This will enable a search box where you can look for the Microsoft Dynamics CRM users you want to grant access to this Send Account.
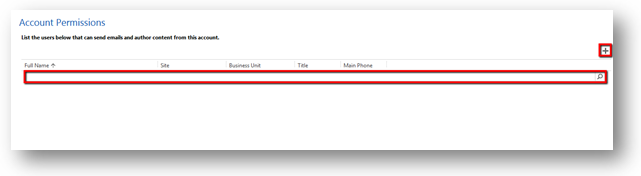
8. When you have finished, click on the Save button at the bottom of the Send Account page.
Comments
0 comments
Article is closed for comments.