
Have you noticed you have a few bounced contacts in your address book? Bounces can happen for a number of reasons, sometimes temporary (i.e. a soft bounce) or more permanent (i.e. a hard bounce).

Bounced contacts can be easily reset, but what is the best way to do that? We'd suggest to either use the Advanced Search option to find all the contacts and put them in a group, or run a bounce report.
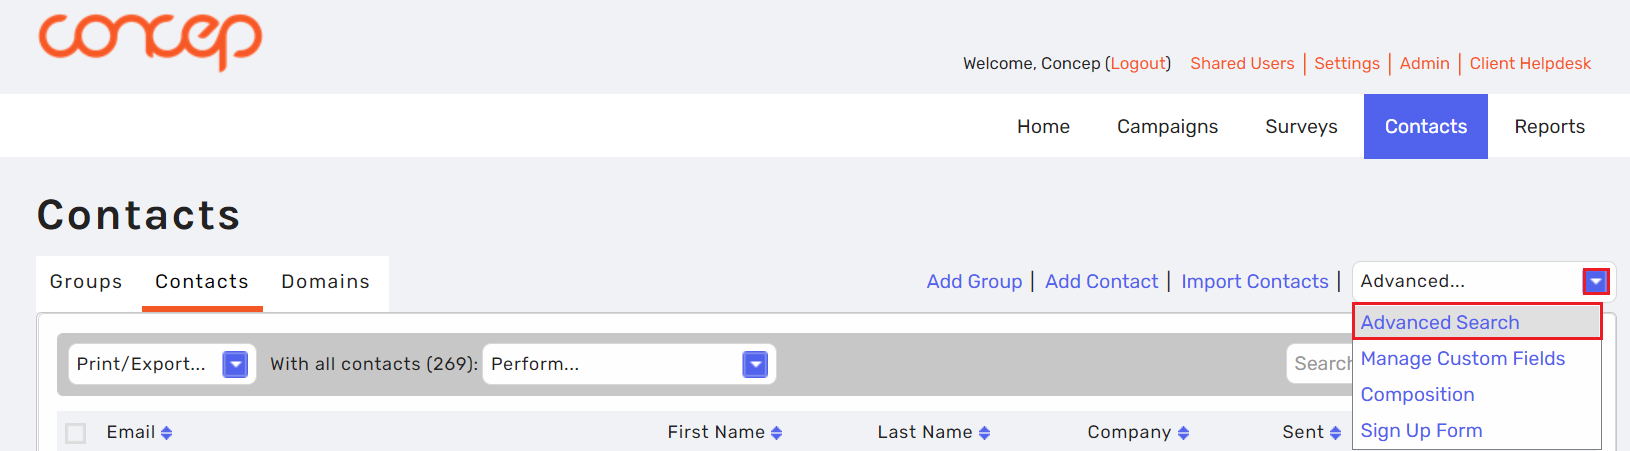
Firstly, we'll walk through the Advanced Search option. You can find this by navigating to Contacts from the Send homepage, click the Advanced drop down menu and select Advanced Search.
Using this option will pull all of the contacts that have a Hard Bounce logged next to their email address. Bounces are logged from sent Campaigns, you can get recipients who Soft Bounce, but those email addresses will not be striked out.
From the pop up, you'll need to select Bounced in the drop down menu for the Field and Match must be set to Yes.
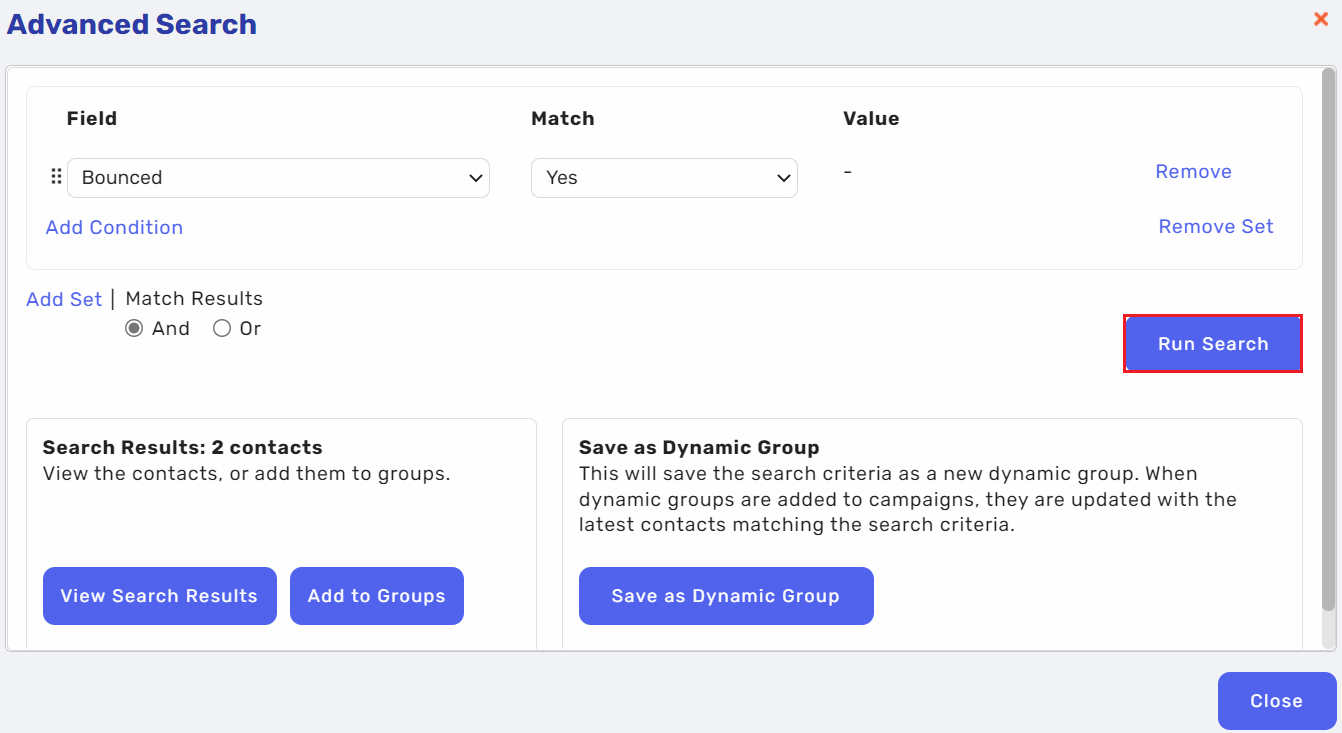
Once set, click Run Search and you'll be able to either add the relevant contacts to a contact group or you can save them as a Dynamic Group. A Group (as accessed by Contacts > Groups will be static, you will have to manually add any additional contacts to them but a Dynamic Group, when set up, can be re run and it will automatically add new bounced contacts to the group).
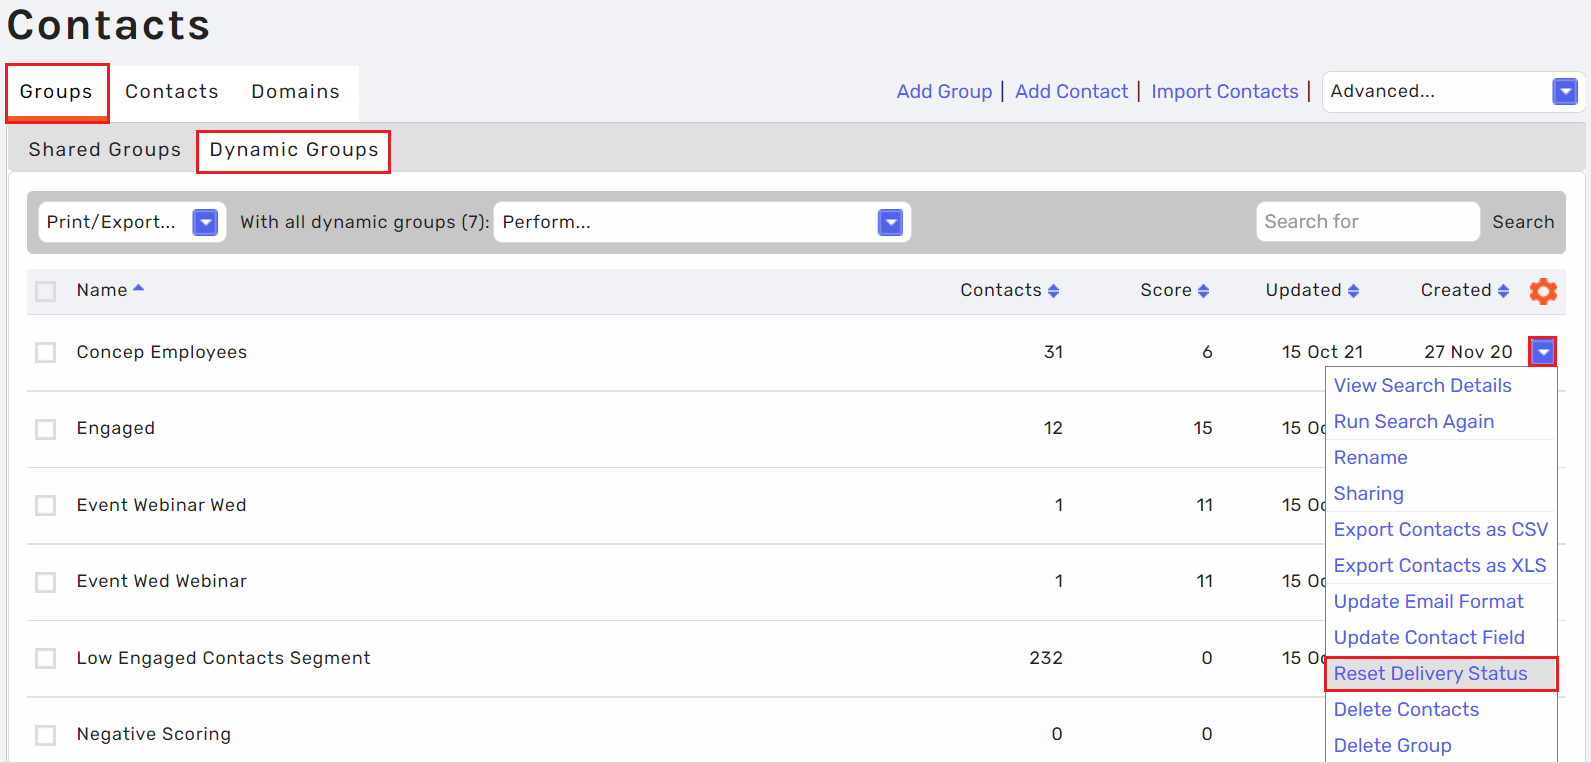
You can either keep the contacts in a group just to avoid clicking them when sending a Campaign, or you can reset their delivery status so you can send to them again. To do so, you'll need to navigate to that group and click the drop down arrow and select Reset Delivery Status.
You can either reset an individuals delivery status or you can reset a groups. Here is an easy summary of how to do this:
To reset the bounced status of an individual contact:
- Click Contacts in the main navigation menu.
- Locate the contact by entering a full or partial name or email address in the Search box.
- Click the down arrow icon next to the contact, and select Reset Delivery Status.
To reset the bounced status of a group:
- Click Contacts in the main navigation menu, and then click the Groups tab.
- Locate the group by entering a full or partial name or email address in the Search box.
- Click the down arrow icon next to the group, and select Reset Delivery Status.
The same steps apply to Dynamic Groups, just click the sub tab shown in the screenshot above.
Another option available, similarly to Dynamic Groups (In the way that they can be re run) you're able to set up a Bounce Report by running a Custom Report.
From the Send homepage, click into Reports > Custom > Create a Custom Report > Contacts > Bounced.
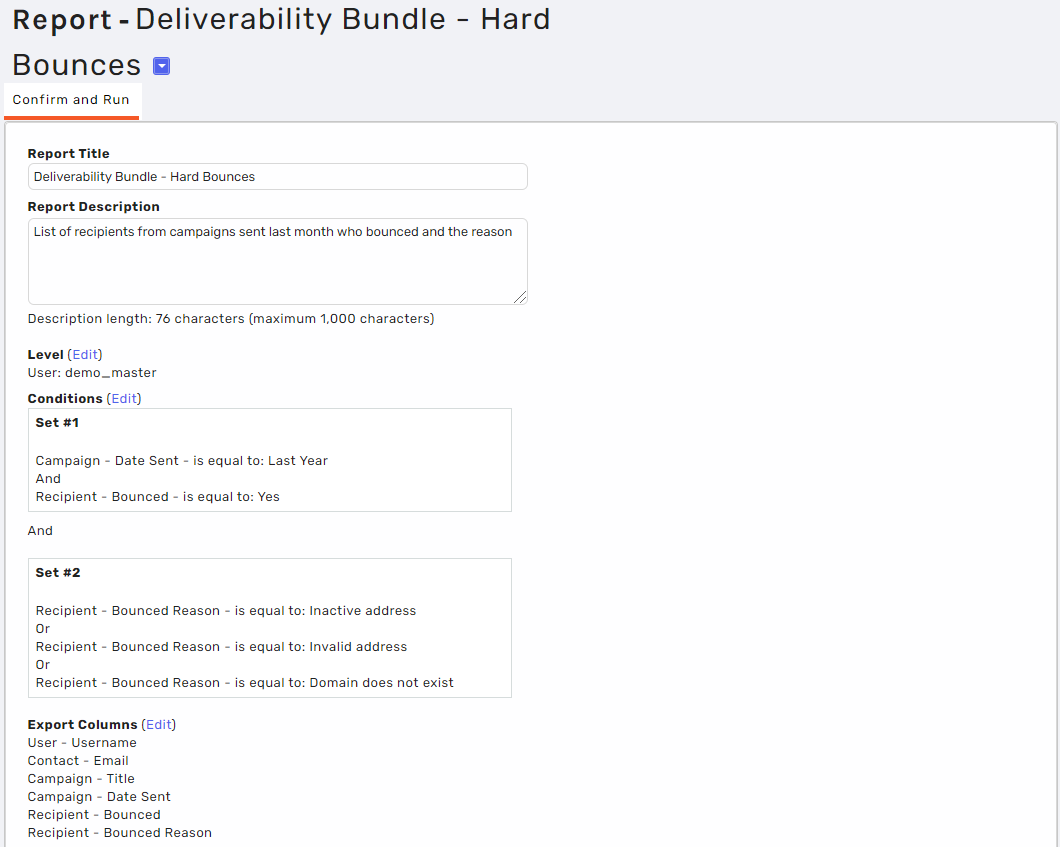
This will open up the Confirm and Run page where you can configure the conditions for your custom report.
I'd generally recommend not to play too much with the configuration, you'll mainly just need to change the Level (i.e. if you're a Client admin you can run this over your entire client, or a Group Admin can run this throughout the entire group).
I also find it useful to click into the Export Columns section and put in additional fields you'd like to see in the export i.e. Campaign Title, Bounced Reason etc.
For a bit more information on the other Custom Reports available, click here, or contact Support to enquire about our Custom Report packages.
Comments
0 comments
Please sign in to leave a comment.