
Creating an action
Action types
Editing/Removing an action
Actions enable you to set up automatic functions to be performed after a page is successfully completed, or if specific conditions have been met in the survey. They're useful tools when it comes to setting up things like event workflows as it does all the follow up for you!
For example, you could set up an action to automatically add all those who have responded to your event to an 'Accepted' group, as well as sending them a confirmation email with all the details of the event.
Adding an action
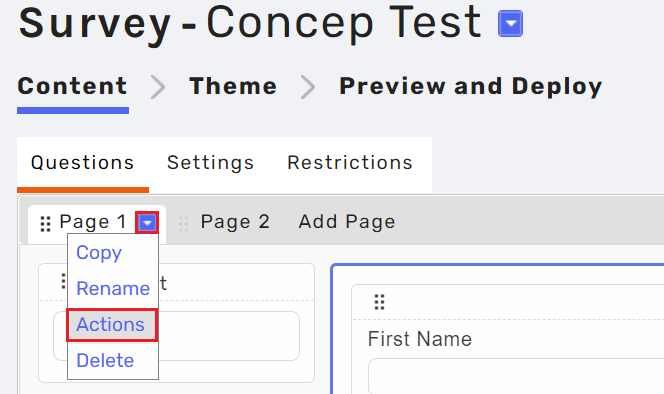
Actions sit within the editing stage of a survey. Navigate to Surveys > Click into the survey you're working on > Select the drop down menu next to the Page > select Actions.
Please note: actions are on a page by page basis, so if you have a long survey with many pages, make sure to add actions to the relevant pages.
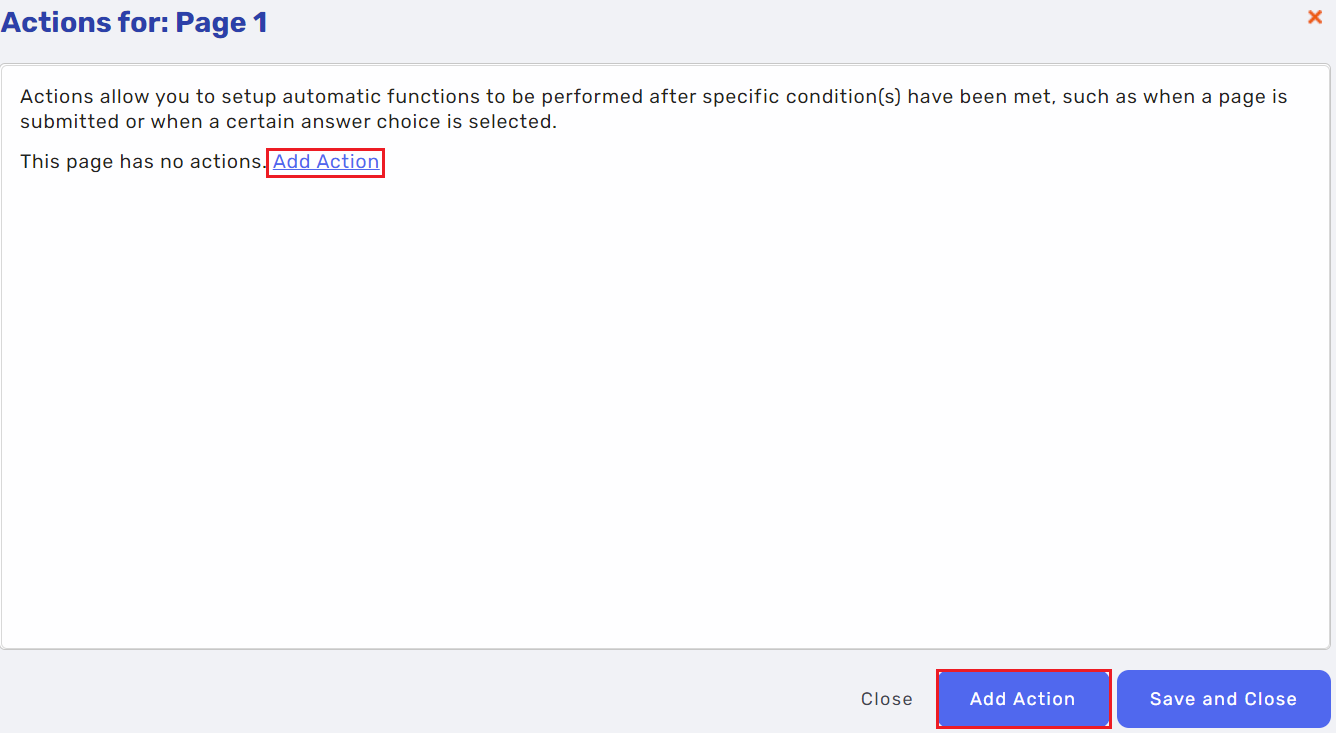
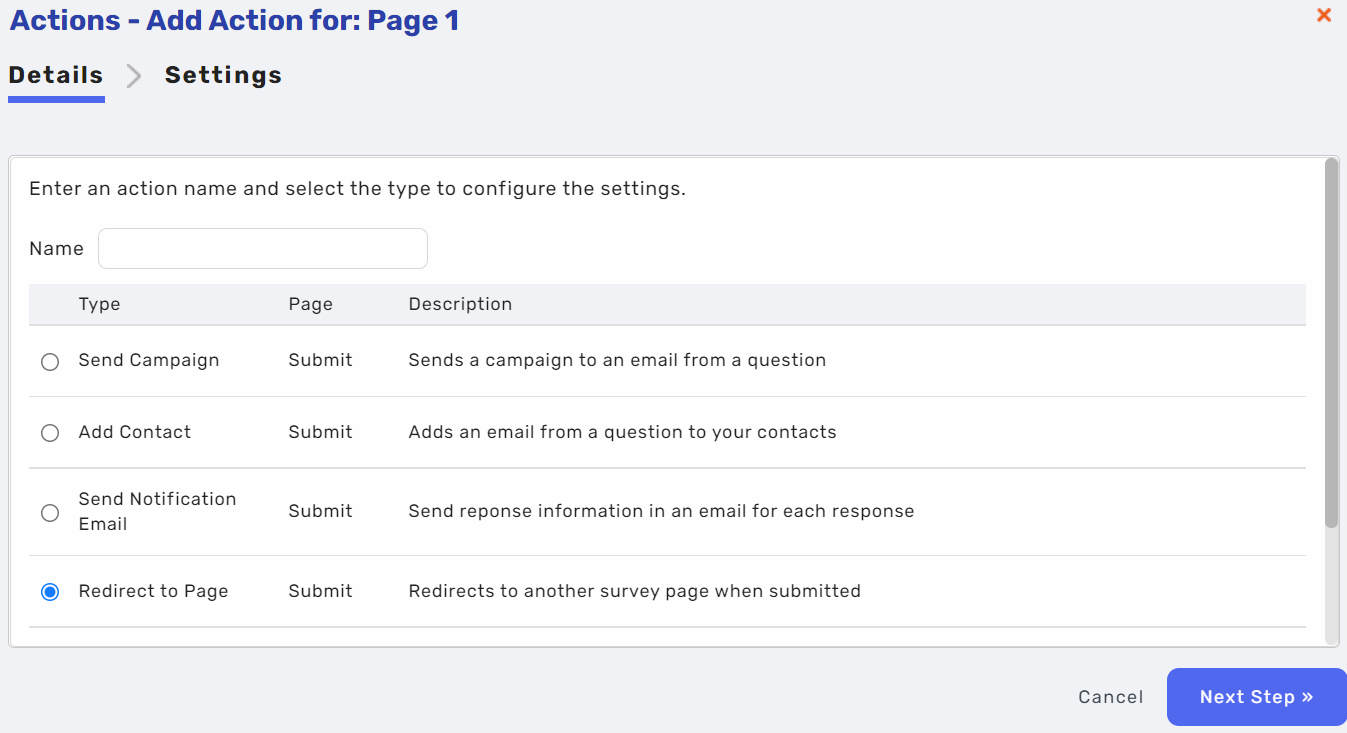
After clicking into Actions, you will be shown the actions for that specific survey page. If there aren't any actions set up yet, or if you'd like to add more, you can click the Add Action button.
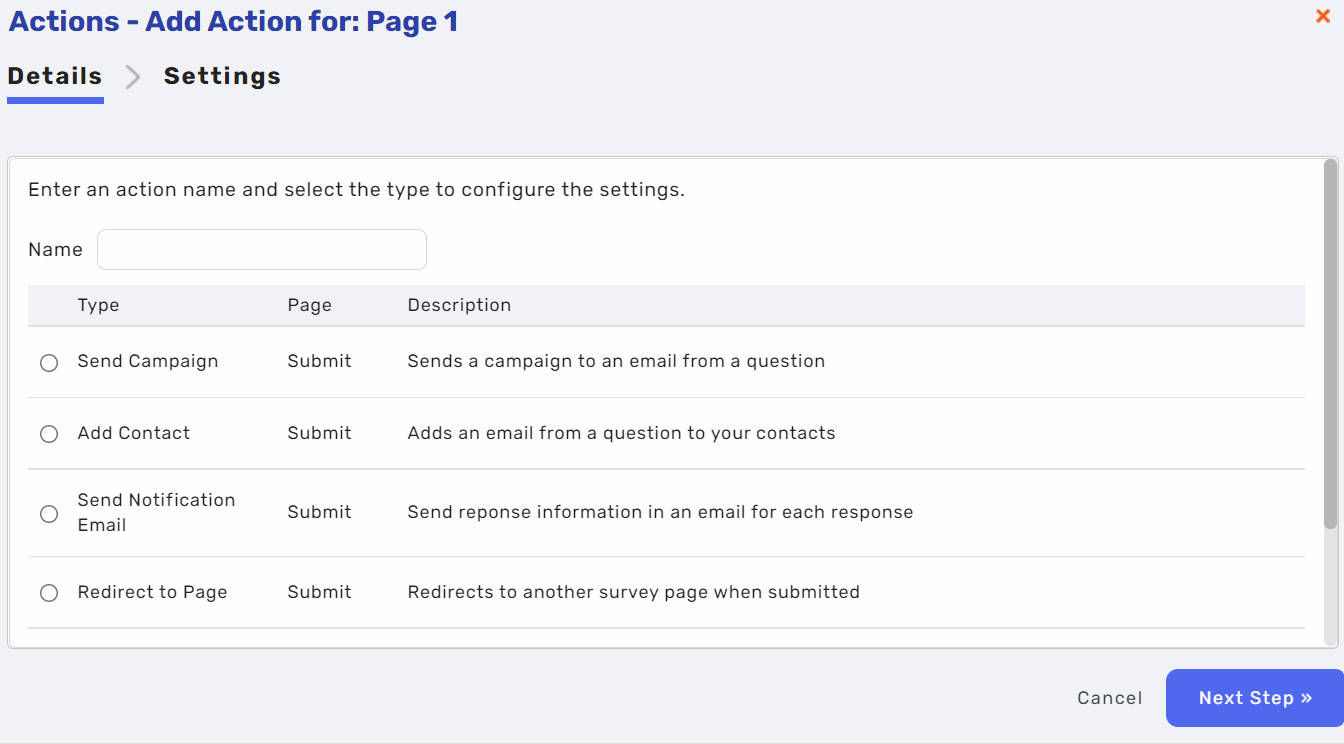
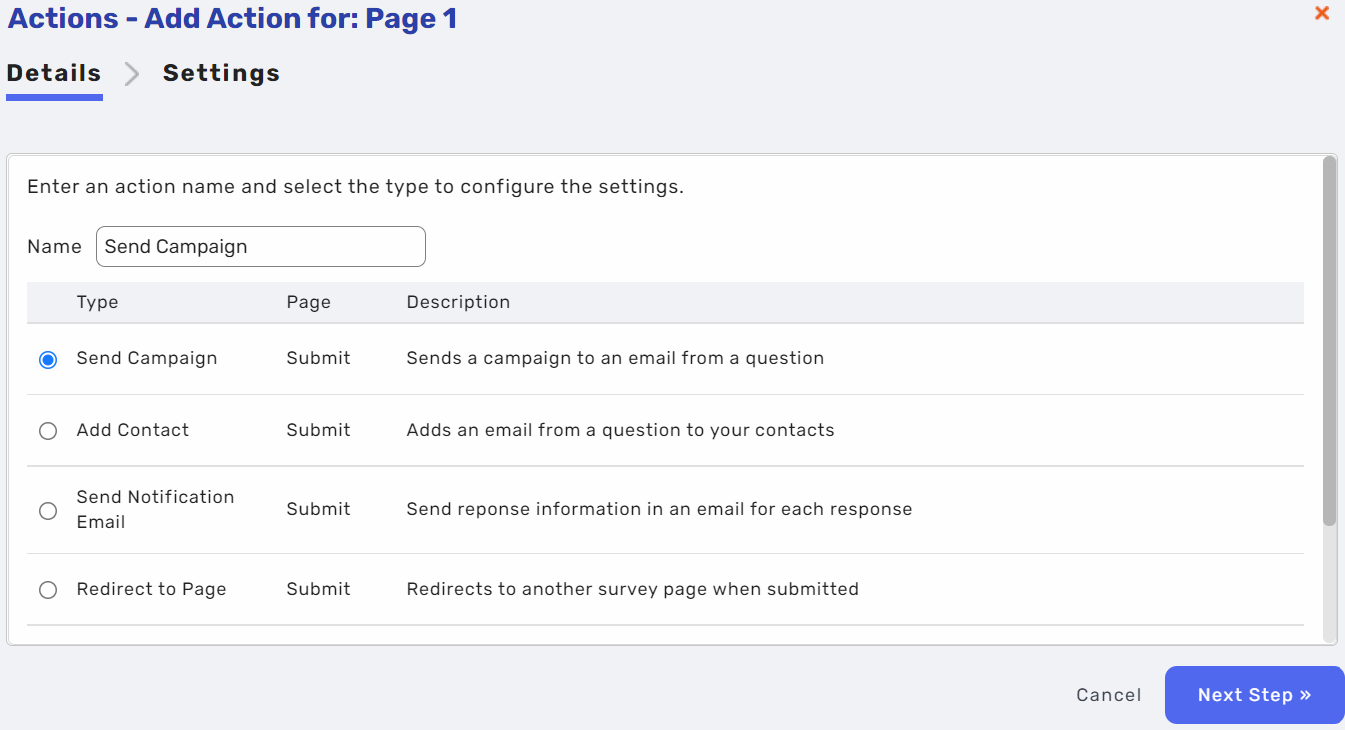
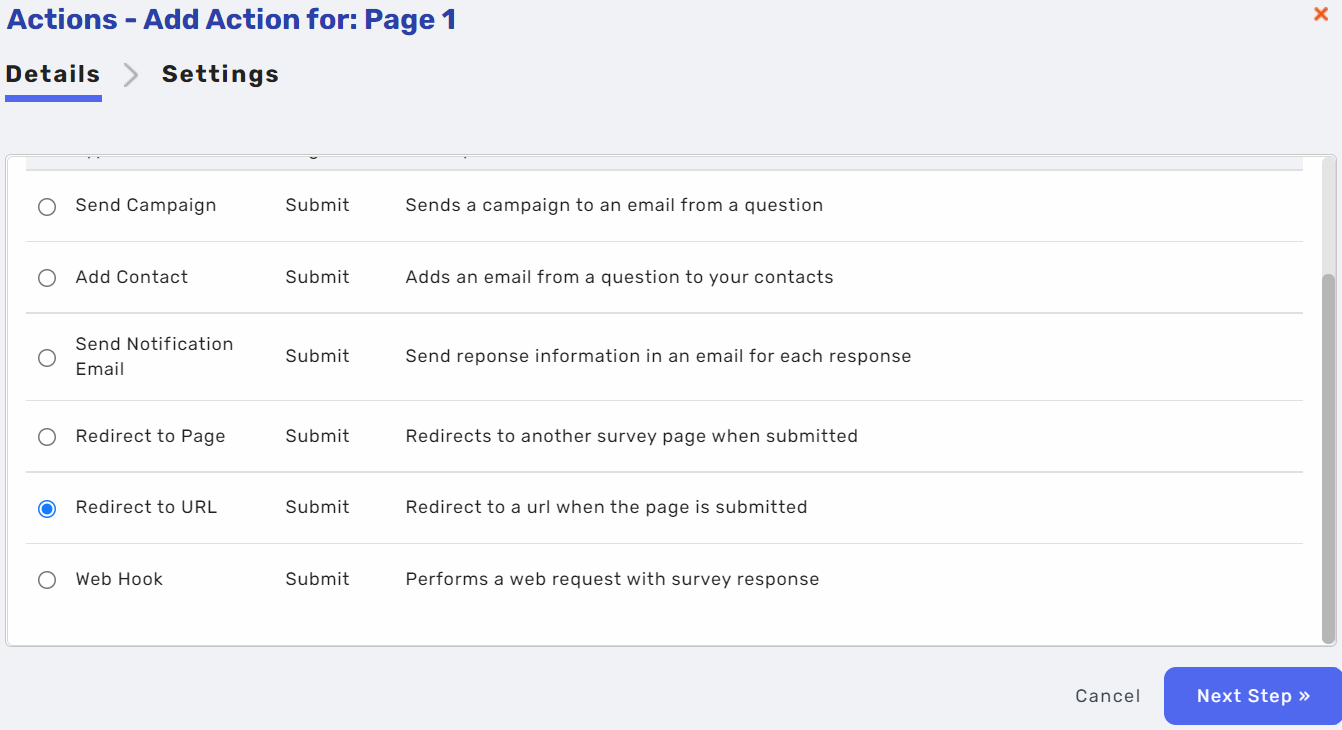
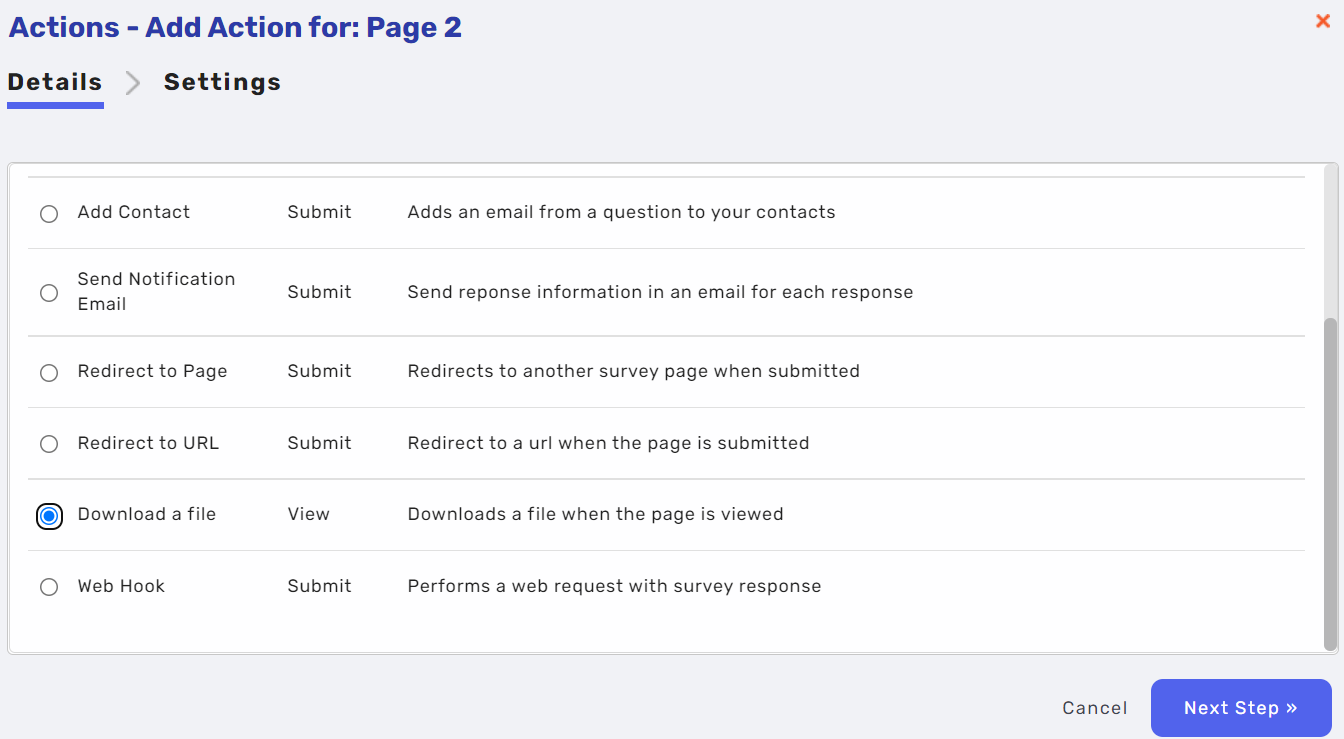
There are six types of survey actions: Send Campaign, Add Contact, Send Notification Email, Redirect to Page, Redirect to URL, and Web Hook. All actions will need titles before you are able to save them.
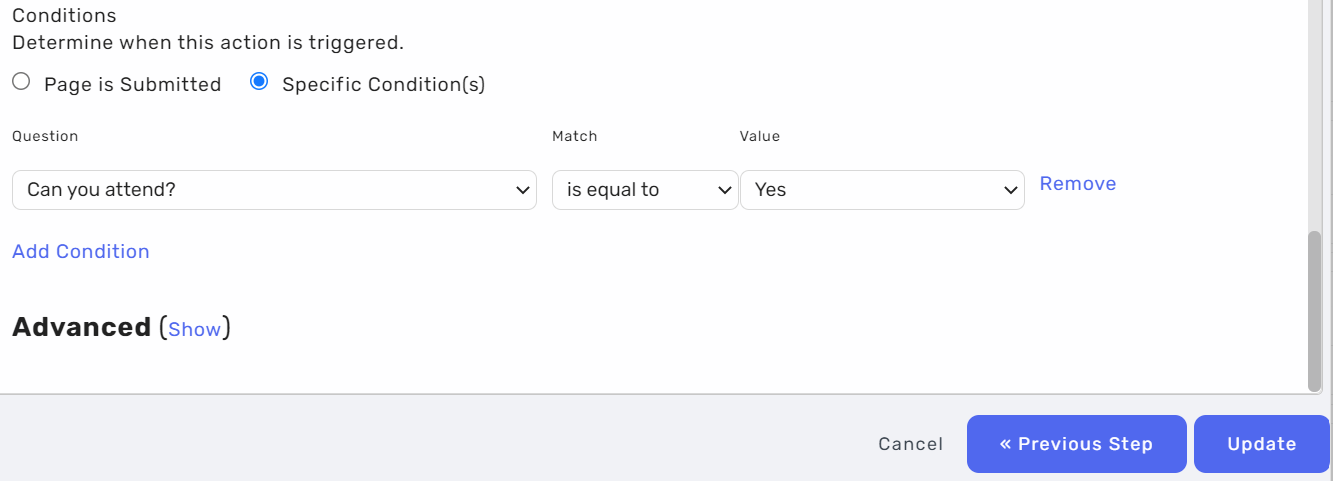
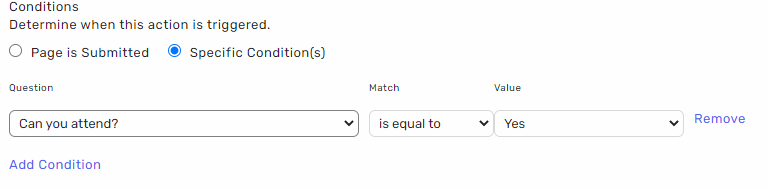
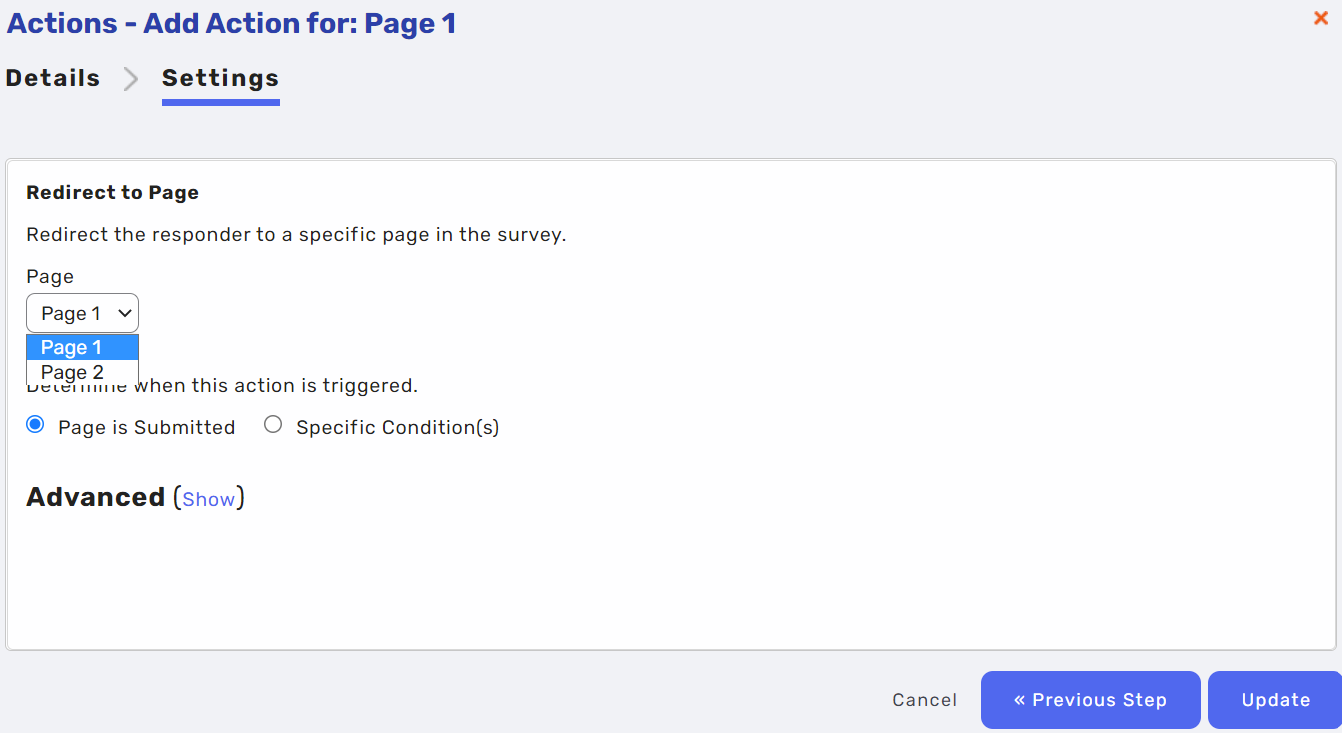
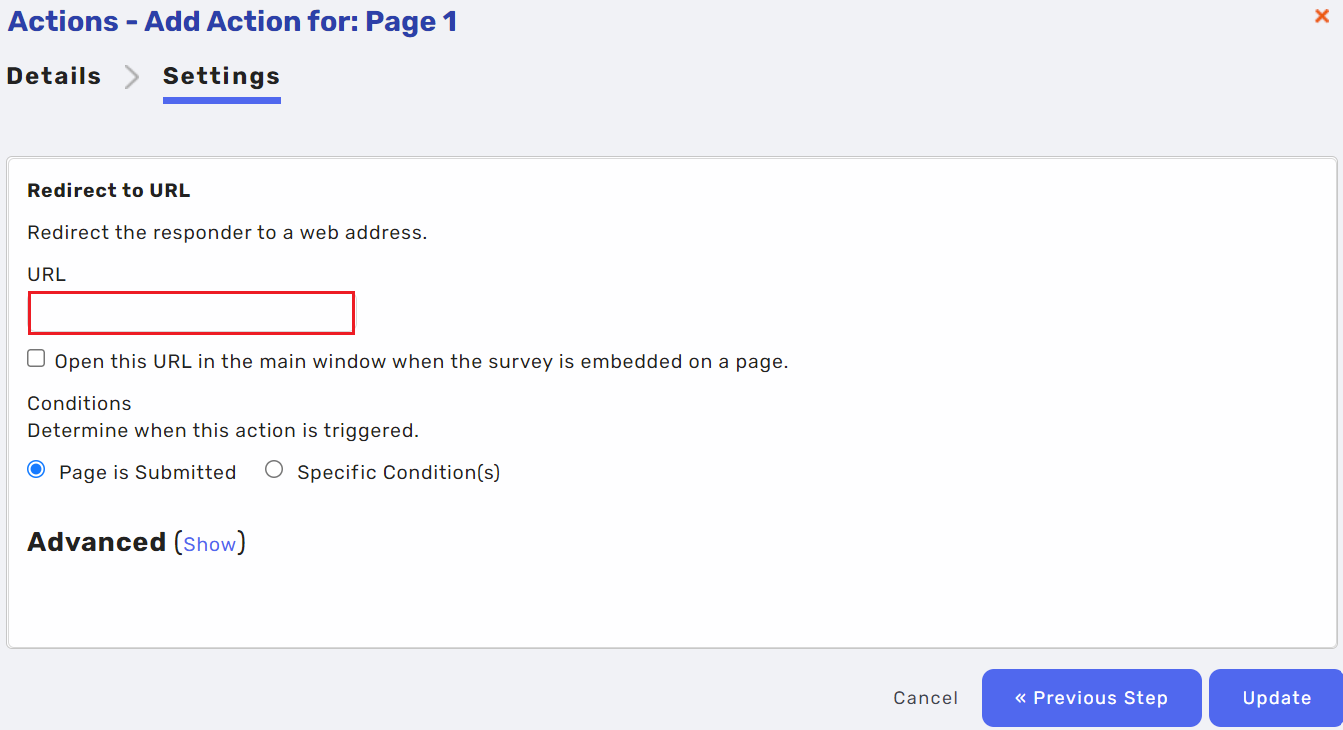
For all actions, you must specify when the action should be triggered. The default condition is upon page completion ('Page is Submitted'), but you could set specific conditions so that the action is only triggered when a certain answer choice is selected (under 'Specific Conditions').
Types of actions
Send Campaign
This action will send out a preselected sent campaign from your Send user account. You will only be able to use a sent campaign because they cannot be changed or deleted, therefore the campaign (and by effect the action) will always stay intact and unedited.
You can also opt to add the responders to a group, i.e. create a group for responders who have selected to attend and have received a confirmation so you can keep tabs.
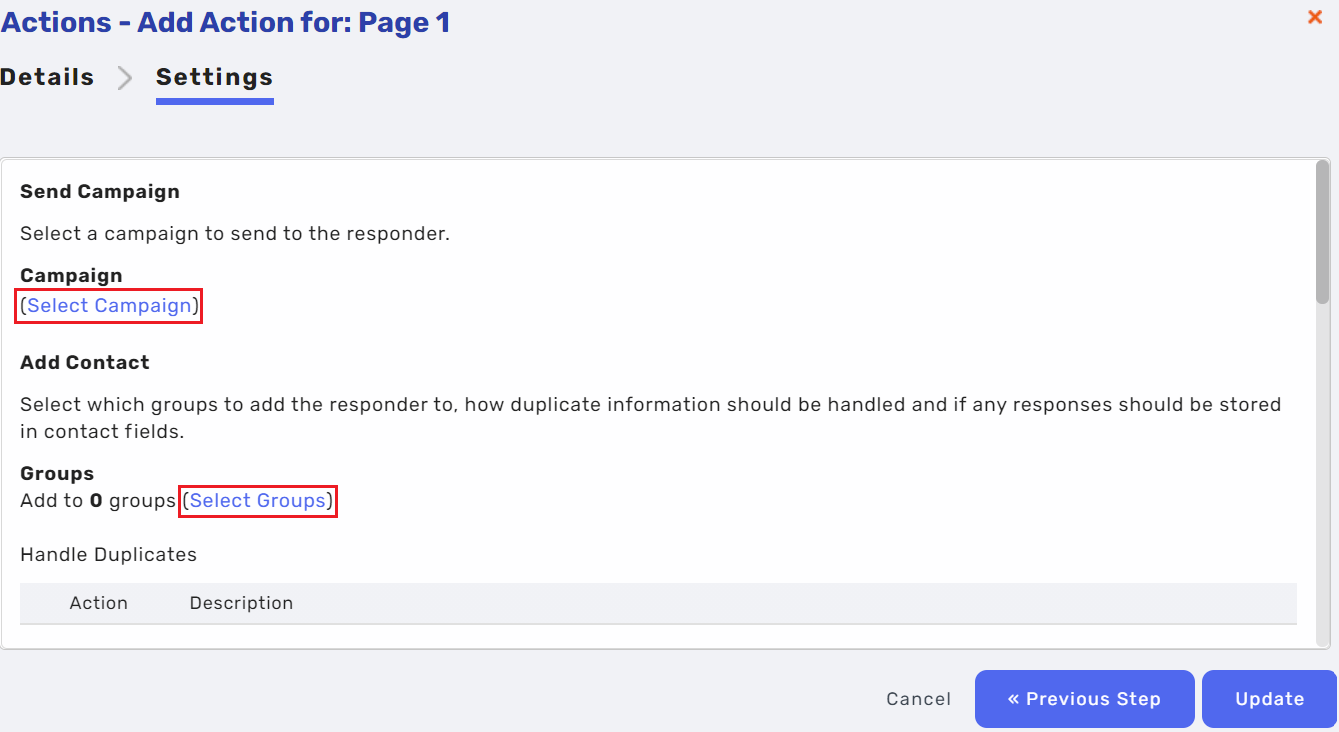
Lastly, you will need to decide if you'd like to store the answers against the contact field. You can opt to leave all questions blank, but the email field must always be mapped.
Add Contact
This action adds the responder as a contact to the address book in the user account that the survey is deployed from. This action is most commonly used for sign up forms, as when the responder fills in their details, they're automatically added to the system for future sends.
To ensure the responder is added as a contact upon completing the survey, you will need to select a contact group(s) that they can be added to. Click the Select Groups link to choose the group(s) you want the contact details to be stored in. You can also click the Add Group link to add new contact groups or choose not to add a group at all.
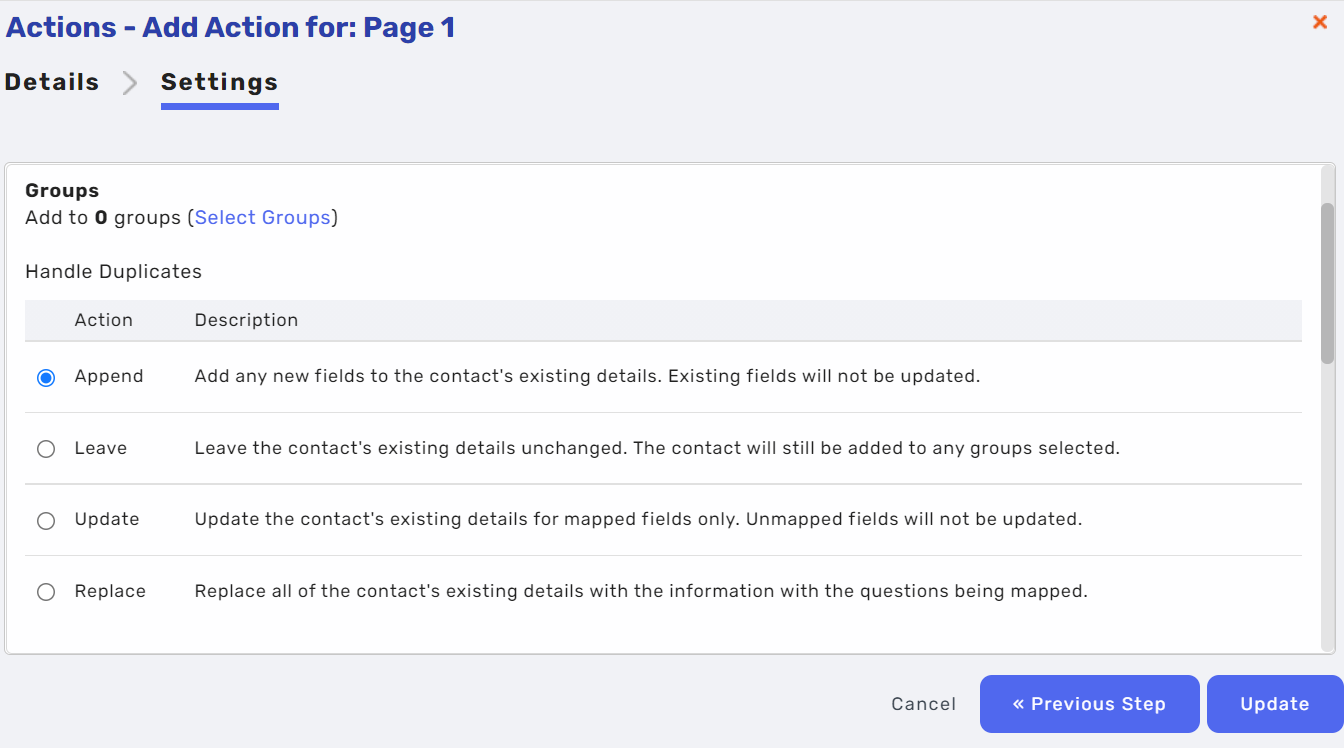
From here you'll need to decide how you handle duplicates: you can choose any of the four options (Append, Leave, Update and Replace), but if you want to know a bit more than the brief description, you can refer to this article.
Send Notification Email
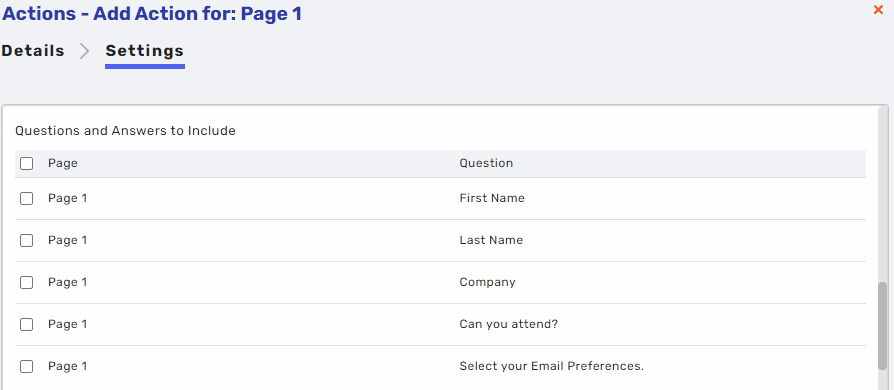
Similarly to Send Campaign action, the notification email is a non-templated campaign that will send out either the details you enter, or the answers from survey questions. You'll also need to add in a subject line and message for both of these options.
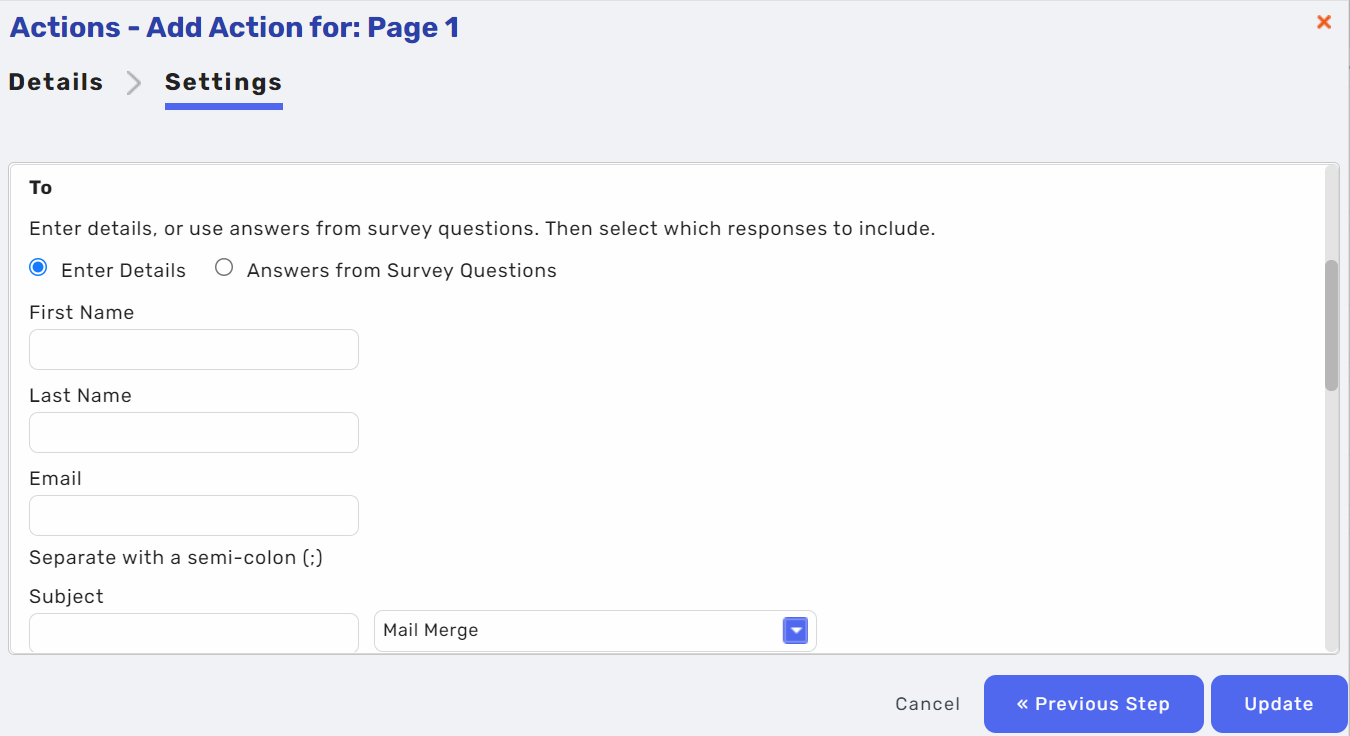
After deciding on either 'Enter Details' or 'Answers from Survey Questions', you'll need to scroll down. From here you can set which Questions and Answers to include and under which conditions the action will be triggered.
Redirect to Page
Redirect to Page will automatically take your responders to a different page, depending on how you choose to trigger the action. This is a versatile action, but we mostly see it used for event surveys. For instance, if the responder confirms that they will be attending the event, they'll be redirected to a 'Yes' page which thanks them for their registration. On the other hand, if they choose 'No, I will not be attending', it will redirect them to a 'No' page.
Redirect to URL
This action will redirect the responder to a web address of your choosing. After adding in a title, you'll need to add the URL you'd like the responders to be taken to. You also have the option to have it open in the main window if you have an embedded survey, as well as setting the conditions of the action.
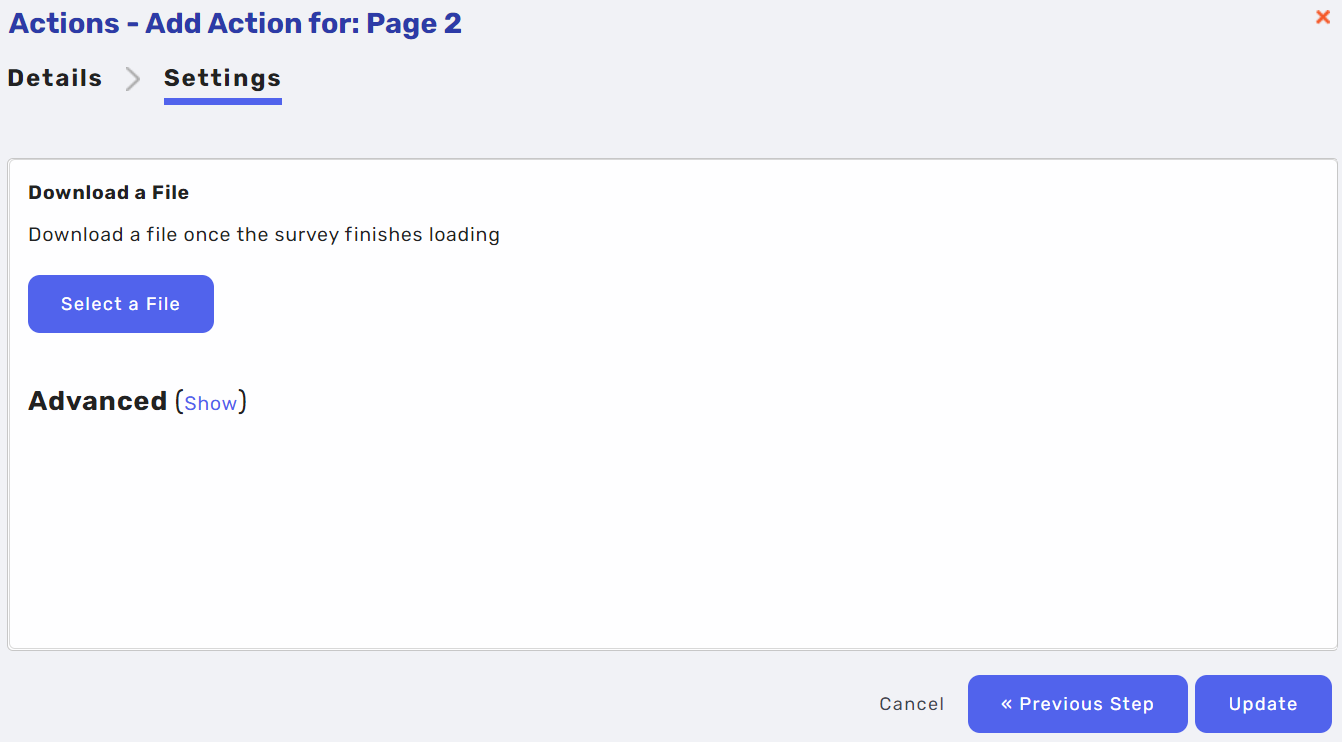
Download a file
This action can be applied to consequent pages in your survey and will allow a responder to have a file you upload to be automatically downloaded to their device.
On Page 2 (or any page after Page 1), you can navigate to the actions tab and select the 'Download a file' action.
You can then select a file from your Content Library to auto-download when the survey has finished loading.
Once all your actions have been added, click update and save the changes. You'll also need to save the survey to make sure the changes have been reflected there too.
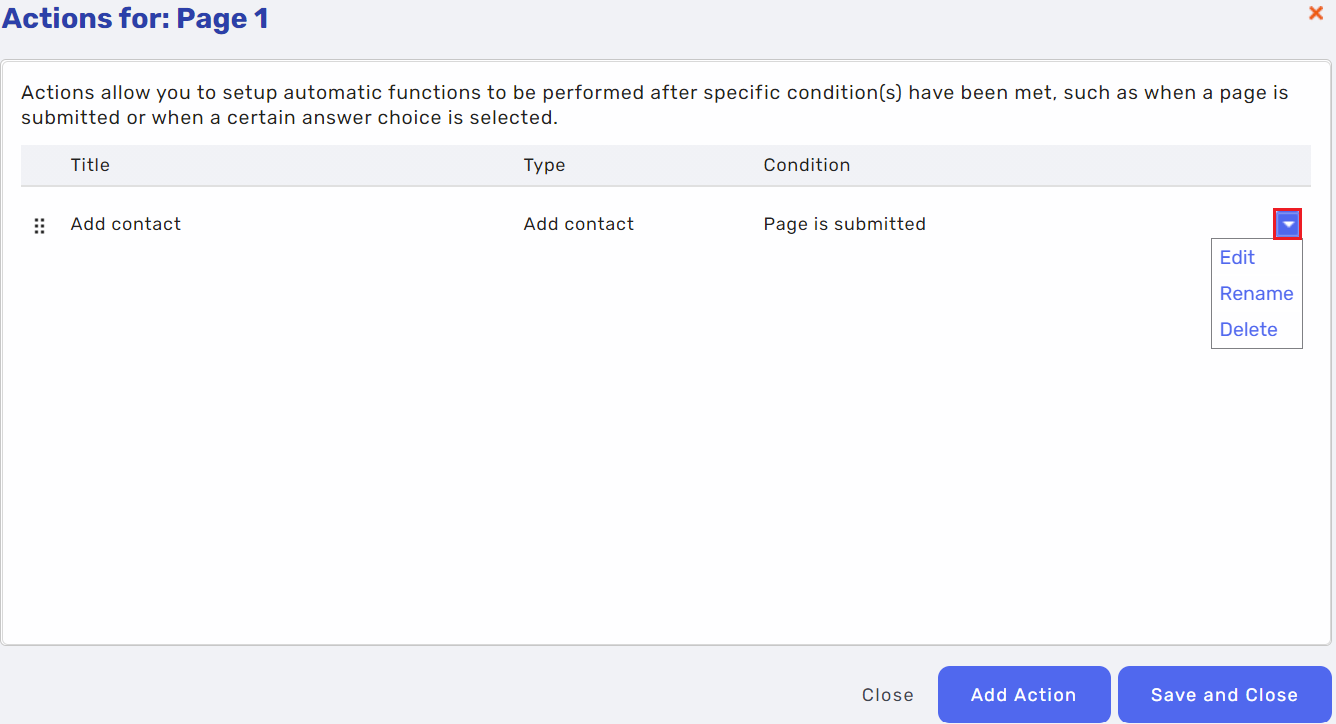
Edit or remove actions
To edit or remove an action, navigate back to the page of the survey, select Actions and click the drop down menu next to an action to edit or delete it.
Once all of your actions are up and running, you can now deploy your survey. I'd recommend to do a few test runs of your survey to make sure you do not have any actions that counteract each other.
Comments
0 comments
Article is closed for comments.