
| I. | Create a new Campaign from a Template |
| II. | Campaign setup |
| III. | Content |
| IV. | Print Friendly |
| V. | Plain Text |
| VI. | Adding a page |
Create a new Campaign from a Template
To begin creating a Campaign, you will first need to select a Template. To do this click on the Campaigns tab and select Create a Campaign.

Once you have selected Create a Campaign you will need to select a Template. To do this, click Use at the bottom right of the Template you wish to use. You will then be prompted to name your Campaign. Provide a Campaign Title and click Create. Doing so will bring you into Content section of the Campaign builder.
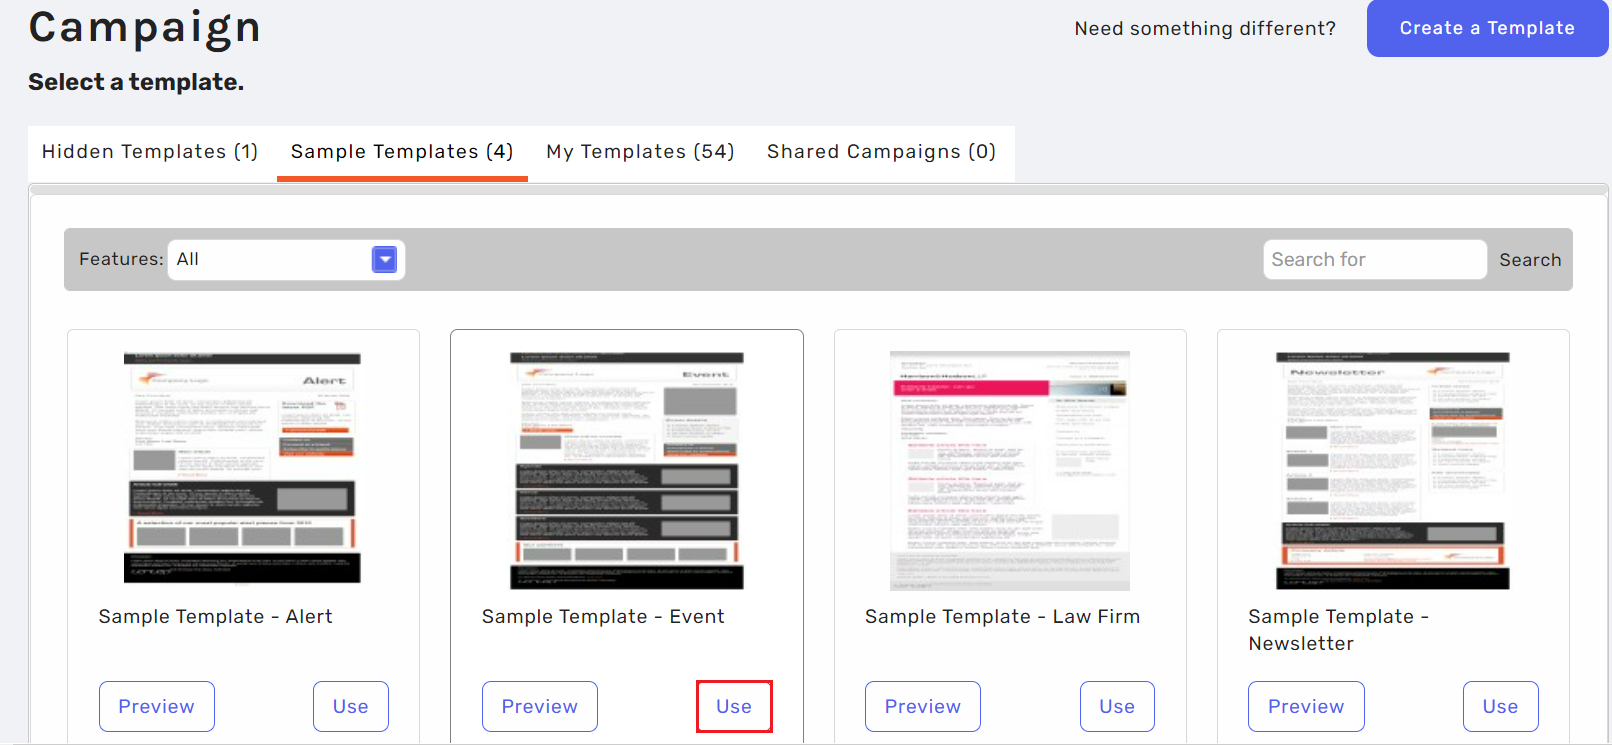
Alternatively, you are able to Create a Template if no pre-existing Templates meet your specifications. To learn more about creating Templates, please click here.
Campaign setup
Now that you are in the Content section, you can start editing your Campaign.
Profile
To begin with, you will need to select your Profile, this is the email or name that will appear in your inbox when you receive a Campaign. You can always add a profile by clicking Manage Profiles.

From
From here you can select the sending domain, which is the email address that will show to your recipient the email address that the Campaign was sent from.

Subject
Enter a subject of your Campaign that will show in the Subject line of the email.
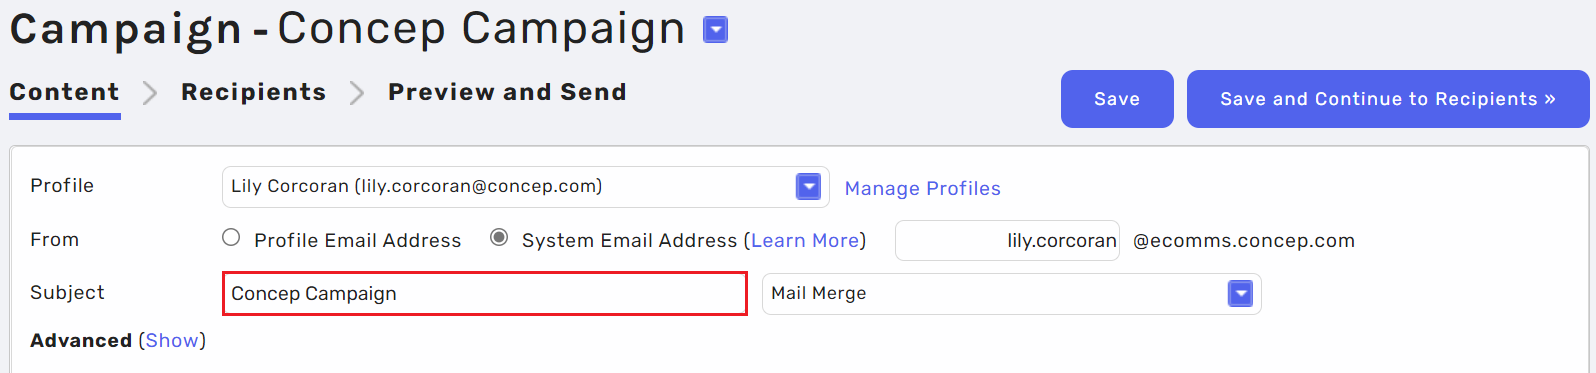
Mail merge
From the mail merge option next to the subject line, by clicking the drop down arrow you will be able to pull specific information from your contacts list data.
For example, if you wish to personalise your communication you can use the mail merge option such as [First_name] which will pull data from each individual contact you send to.
Replies
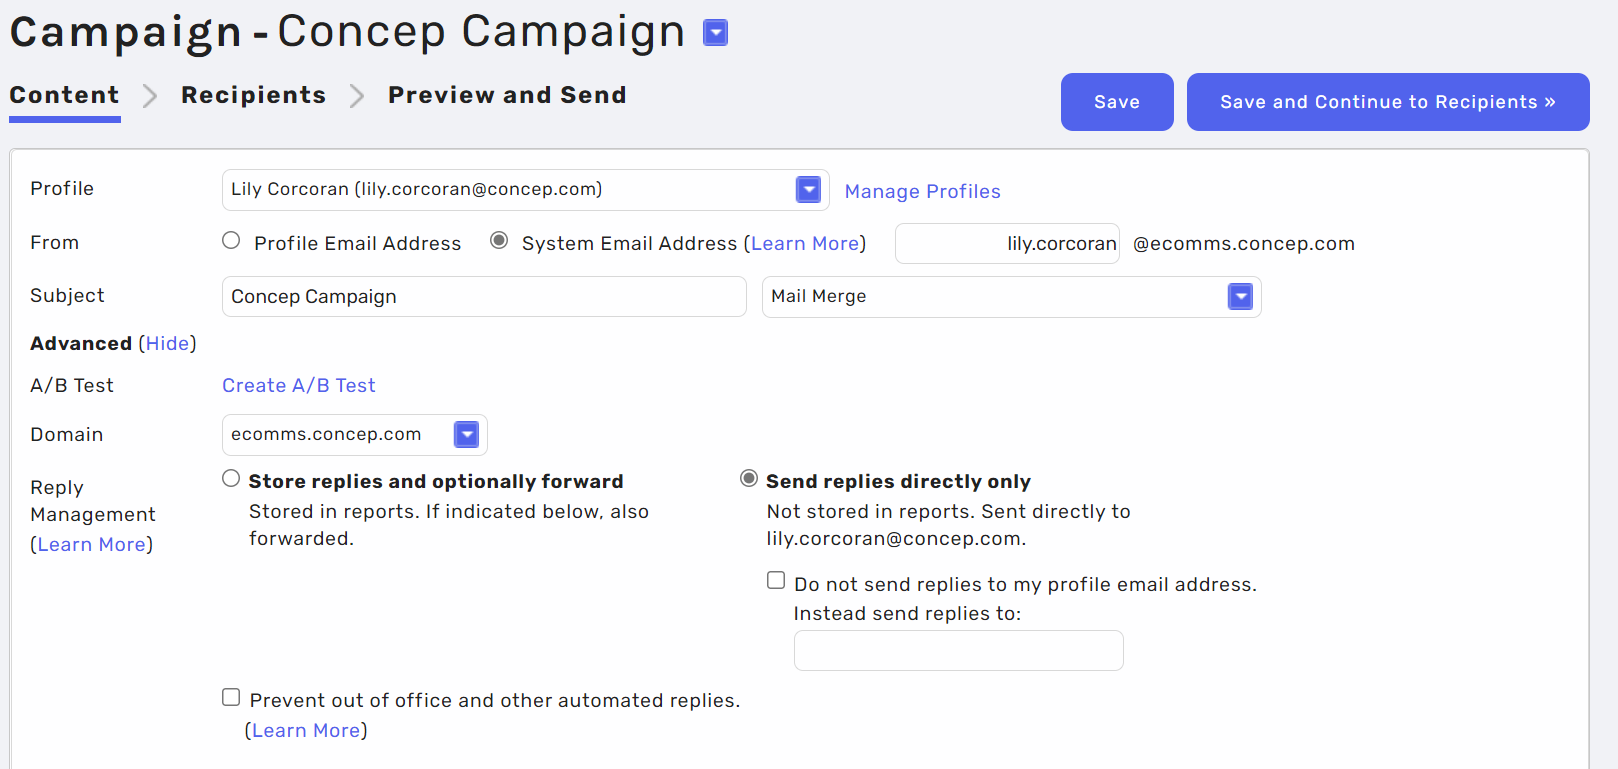
Click Show next to the Advanced option to reveal the Reply Management settings.
You can opt to store your replies in Sends reporting section, or you can opt to send replied directly only.
Replies can be sent to either one or multiple email addresses. Tick Do not send replies to my profile email address. Instead send replies to and make sure to separate multiple email addresses with a semicolon.
Alternatively, you can set the replies to go direct to the Profile email that the Campaign was sent out from.
Once you have set this up you will have to create the main body of you Campaign.
Content
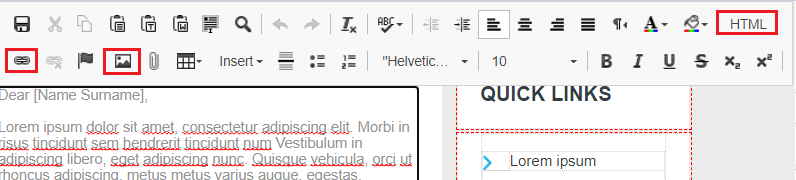
You are able to edit any Content within the red dotted lines. This is used to indicate what can and can not be changed.
When clicking in one of the editable boxes, the Tool Bar will appear. If you have HTML experience, you will be able to click on the HTML icon to edit the HTML. You are able to create links to another page in the Campaign, a Survey or any external websites. You are also able to import an image by clicking on the image icon.
Please note that we advise that you click save frequently as you go.
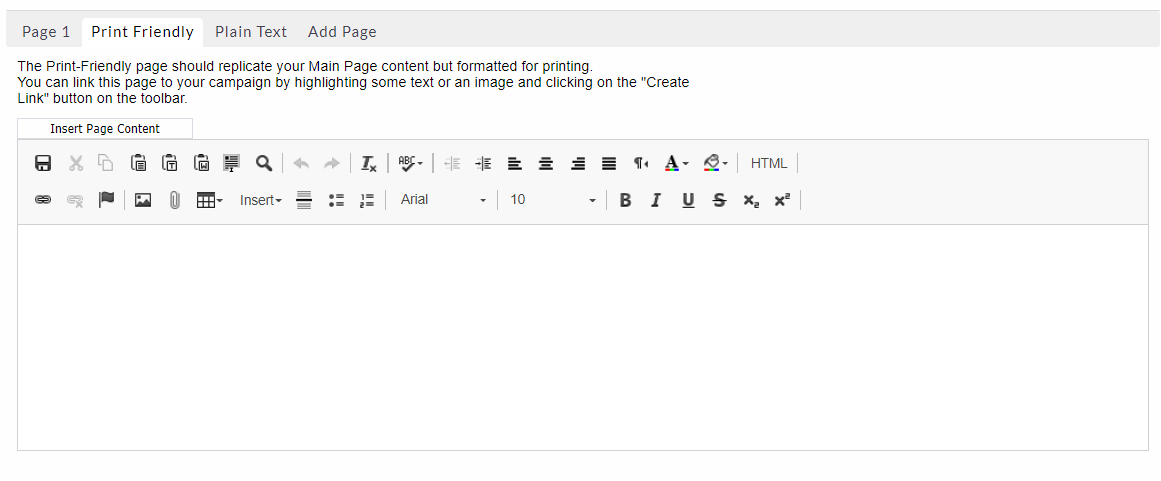
Print Friendly
Creating a Print Friendly version is discretionary. Many Clients create a print and mobile friendly version for those recipients who receive a Campaign on a handheld device.
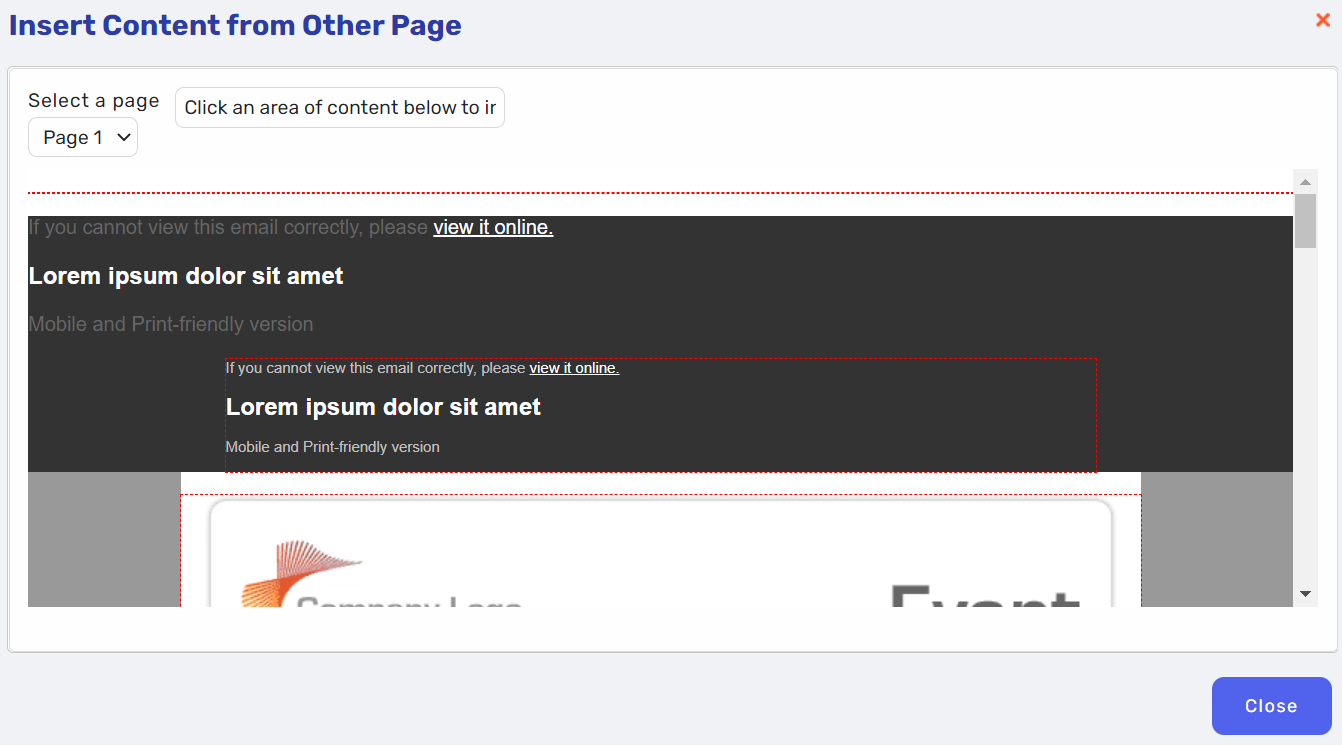
To access the Print Friendly feature, click on the Print Friendly tab and select the Content areas you wish to display on the Print Friendly version of the Campaign by selecting Insert Page Content from the drop down menu.

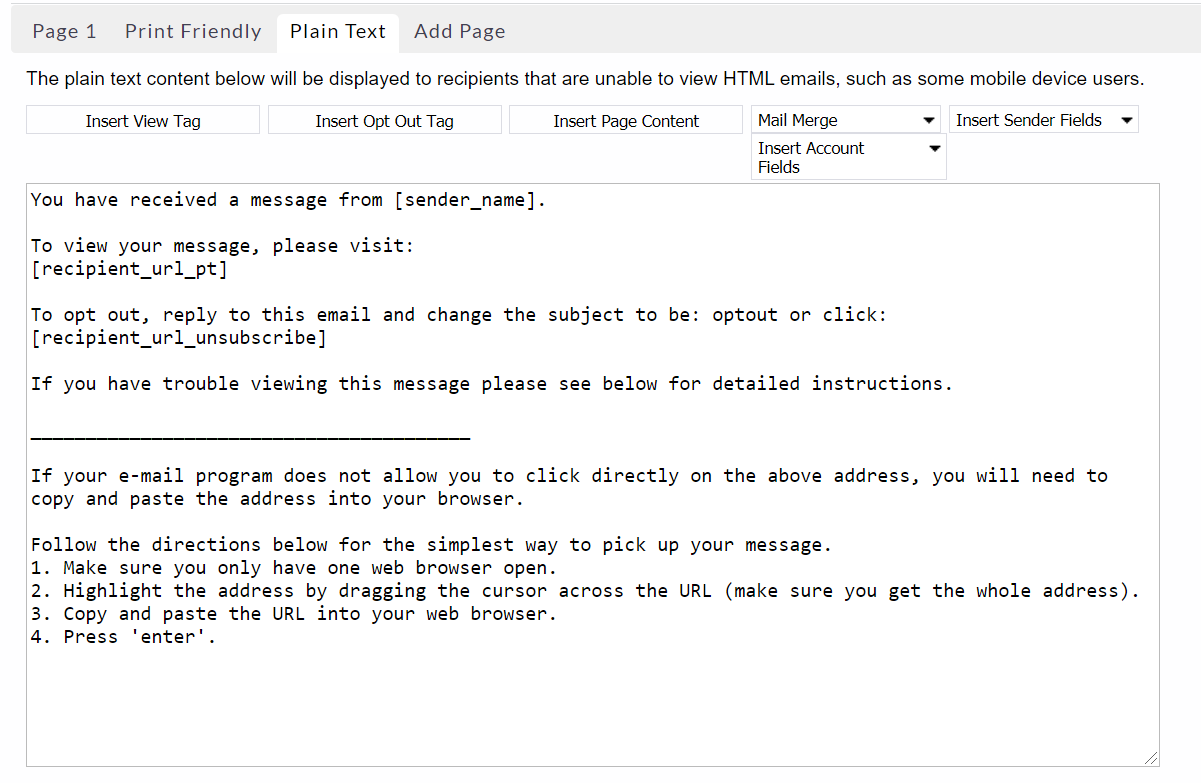
Plain Text
Plain Text set up as default and the same message runs across all your Campaigns. This will be sent to recipients if they are set to plain text if they are using a device cannot accept the HTML such as a Blackberry. The URL is created and is sent automatically.
We always advise that some basic content to be entered in order to engage the recipient. This can be set up per User Account or at Client/Group level. The benefit of this is that when you create a new Campaign you don not have to edit it each time.
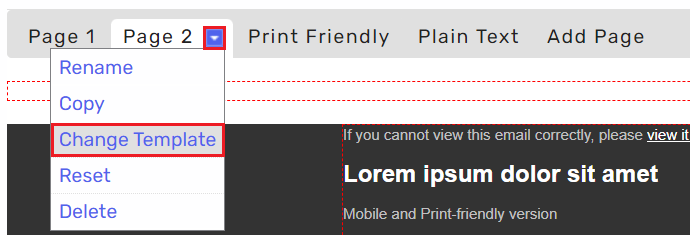
Adding a page
To add a page to a Campaign, select the Add Page tab at the top of the screen. and enter a Page Name.

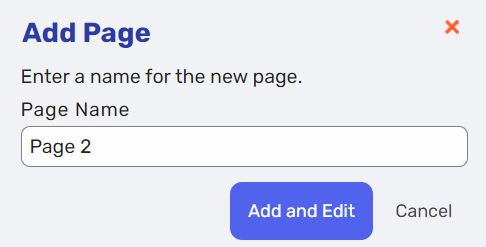
On the new page you just created, you can select the drop down arrow for more actions. The new page will automatically use the Template you have selected for the first page. However, you can change this by selecting Change Template.
Comments
0 comments
Please sign in to leave a comment.