Your campaign banner is the first thing your recipients see when the email lands in their inbox. This is their snapshot preview to the email and lets them know what’s in store if they read on. That’s why it’s so important that this renders correctly in all your recipients’ inboxes.
Historically, it's been popular to include a sole image at the top of emails which would act as the banner, also conveying the main message of your communication. The problem here is that you're reliant on the recipient downloading their images or you risk being less impactful. To overcome this, we recommend using a dynamic banner.
Dynamic banners are comprised of multi-columns, and are typically made up of a combination of text and images. The text will pull through in your contacts’ inboxes straight away, and the image is a downloadable extra. This way, nothing gets missed and your recipient receives the key information.
Dynamic banners aren't just about conveying the message though. Since they are made from multi-columns, they inherit the same characteristics as they would if you used multi-columns anywhere else in your campaign. Most notably, they stack on mobile devices which can add another dimension to your banner compared to if you just used a single image.
Here's an example of a dynamic banner, in both desktop view and mobile view:
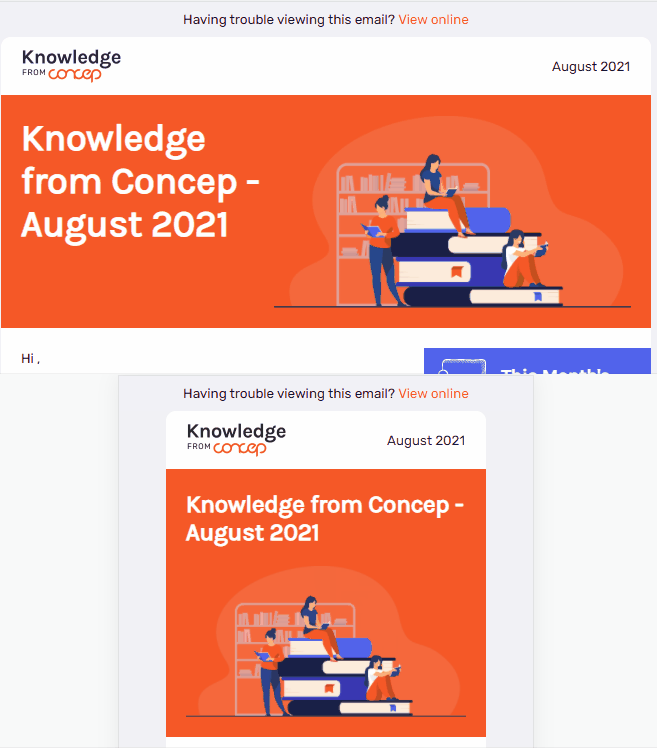
Please note that create a dynamic banner will involve editing HTML but we will guide you through below.
How to create your own dynamic banner:
- Open an in progress Campaign and drag in a container:
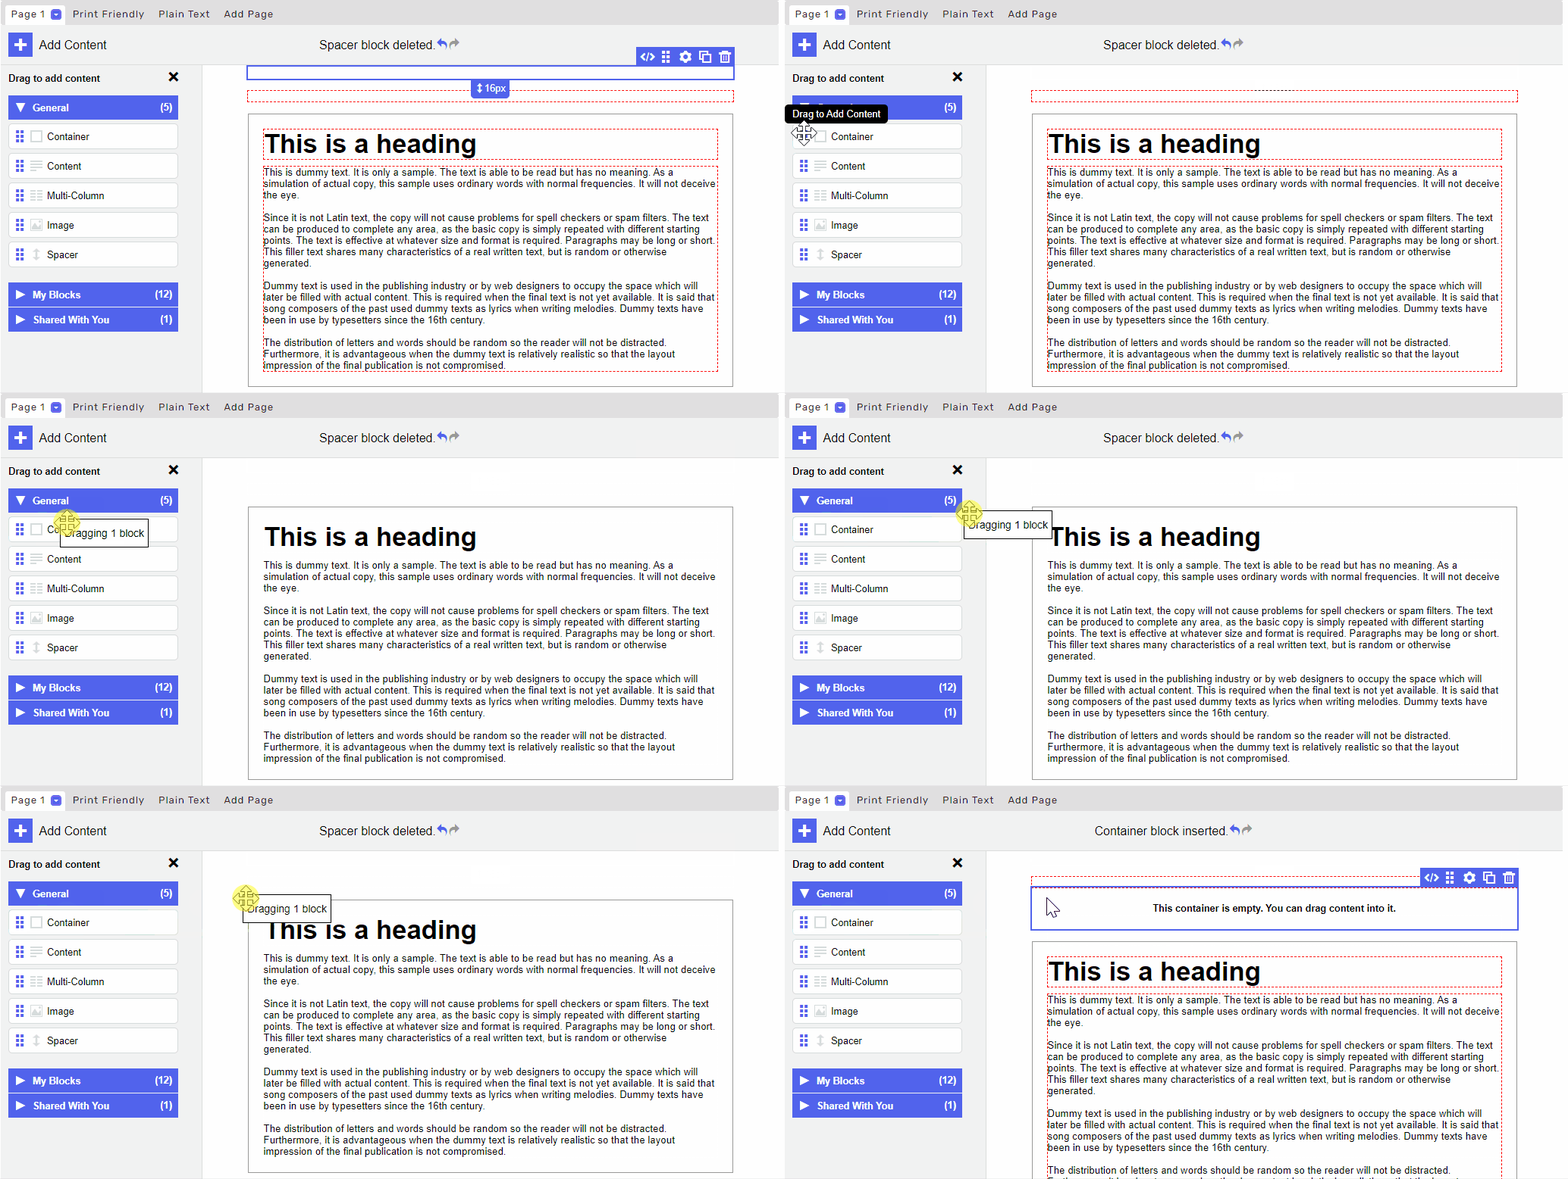
- Hover over the container and click "Edit HTML":
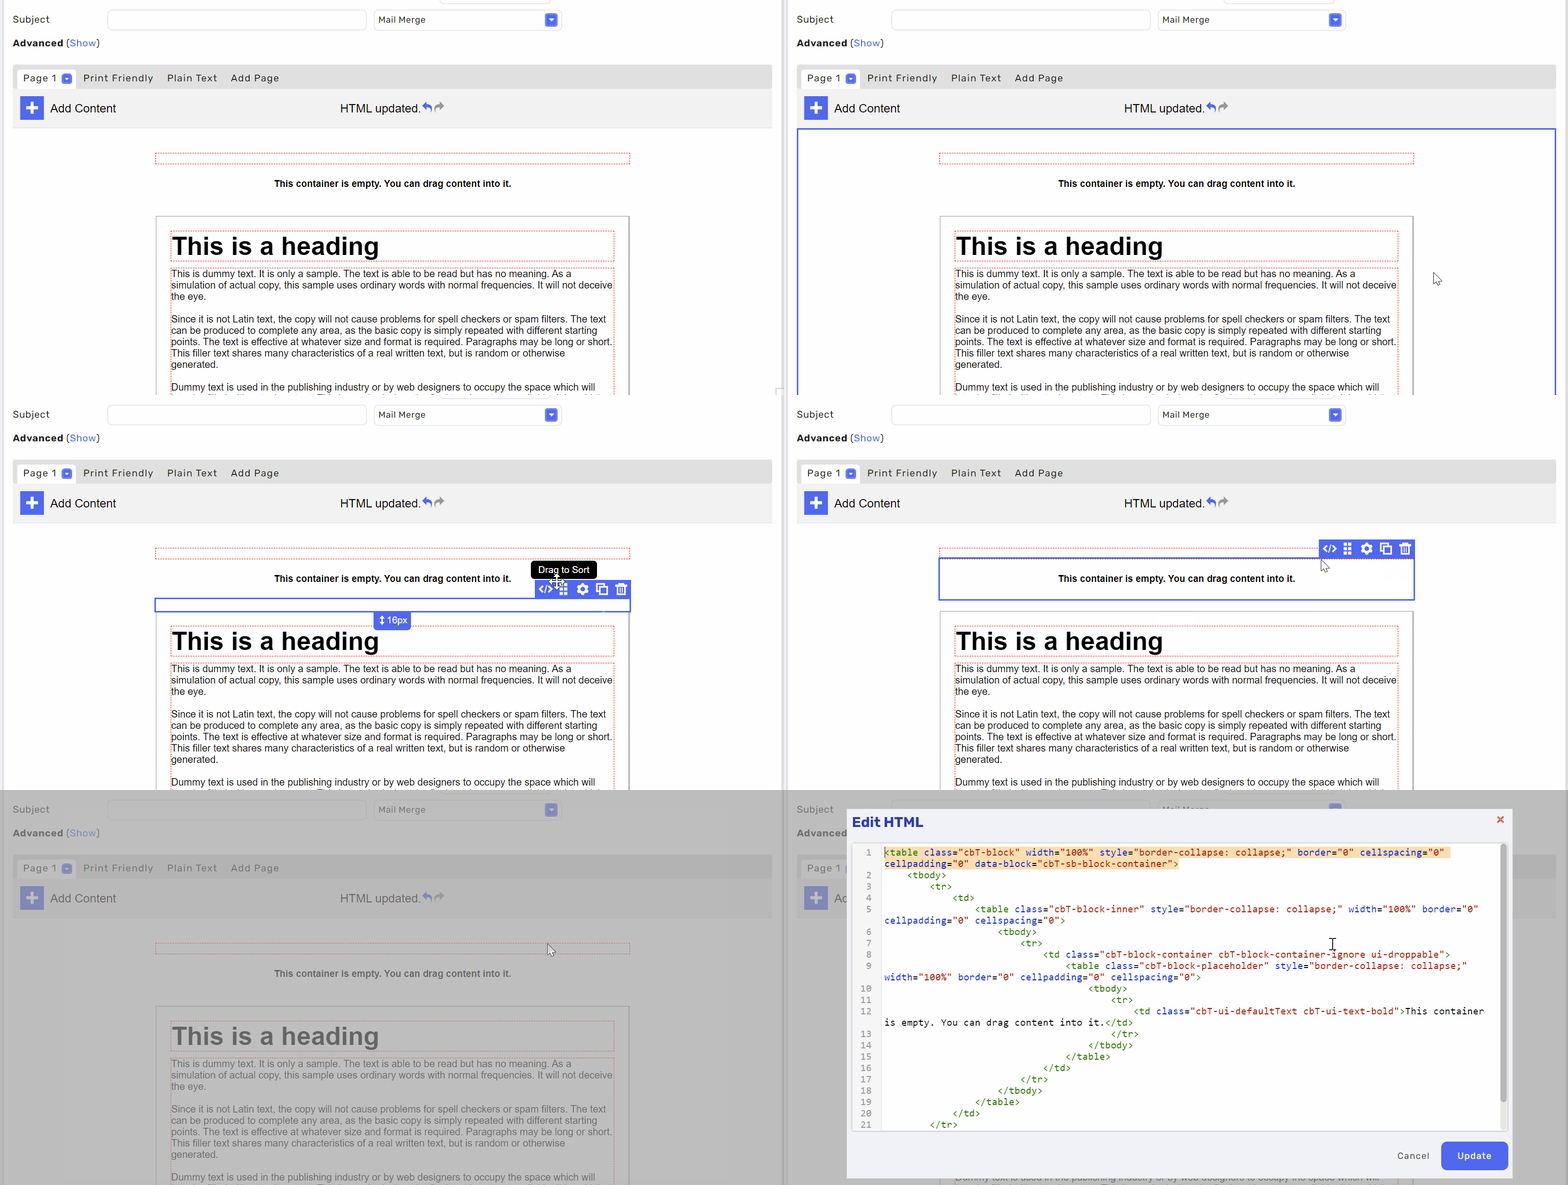
- We need to make 2 changes in the HTML:
i. Copy and paste the following class into the first line, as shown in the screenshot below:cbR-device-width

ii. Adjust the width from "100%" to a specific number of pixels (i.e. the total width of your campaign, 650px is best practice):
- Adjust any other settings on the container to adjust the style (i.e. padding, background colour):

- Drag a multi-column block into the container:
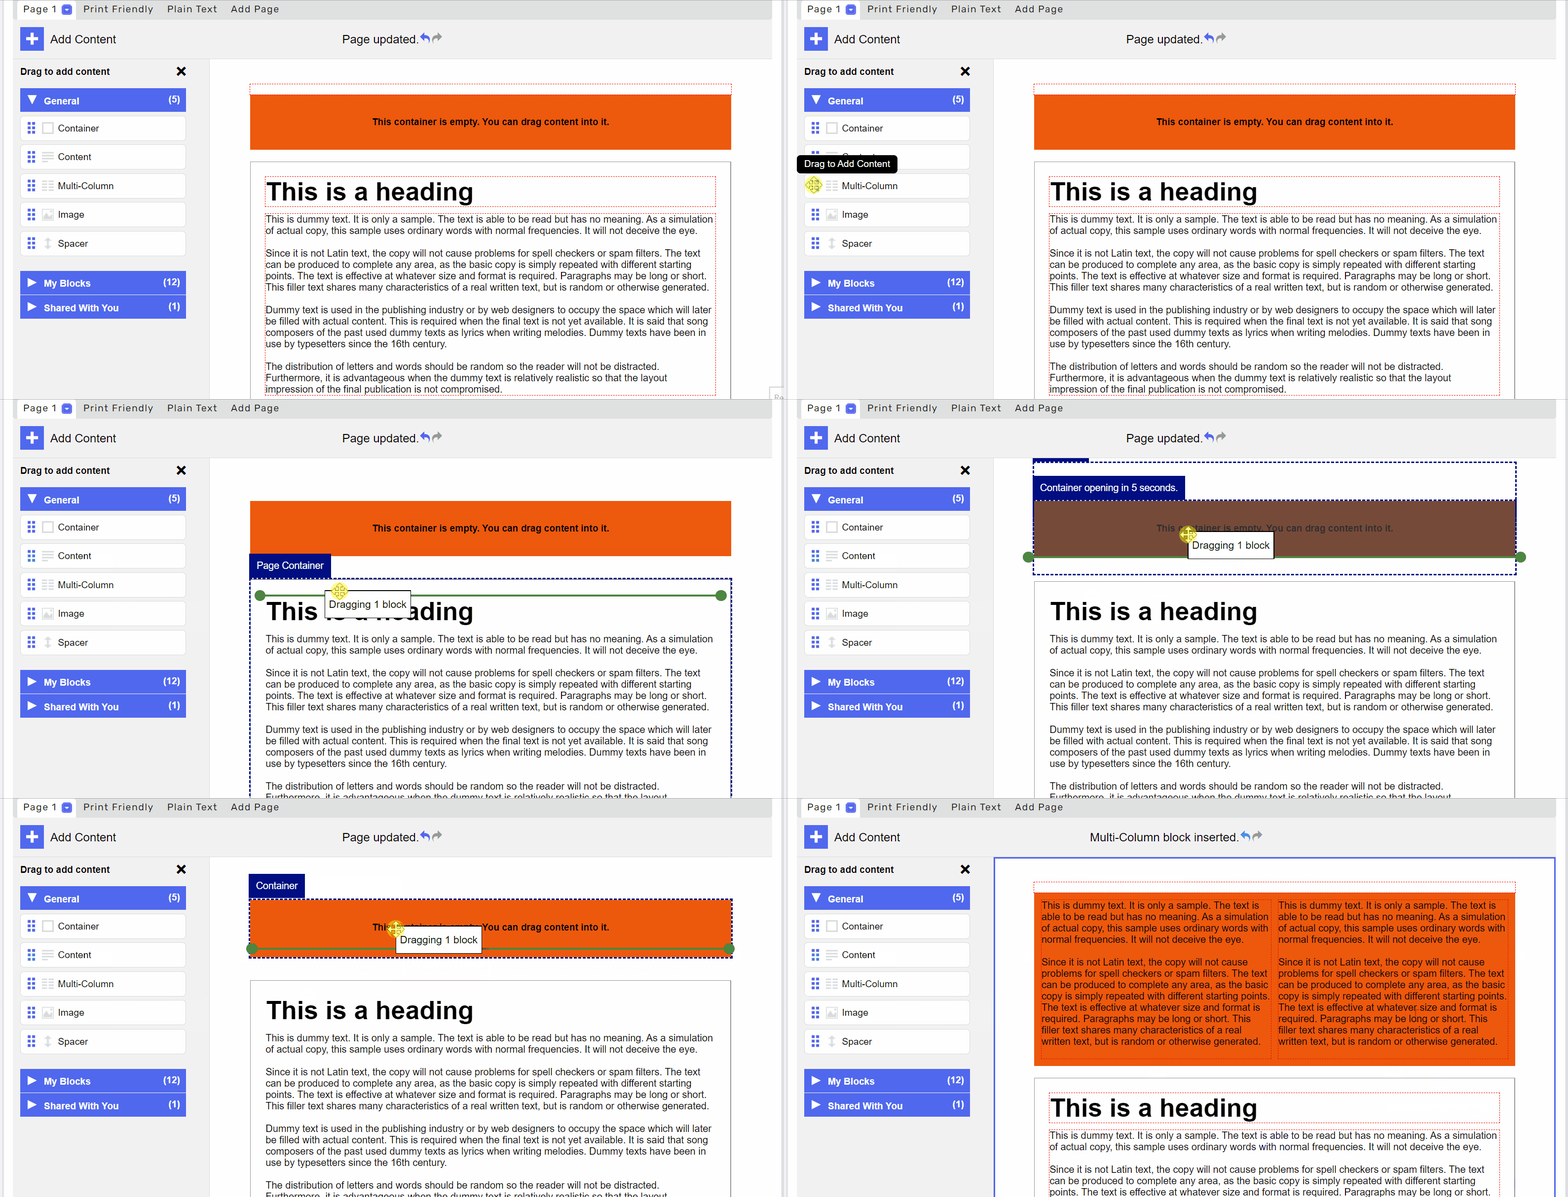
- Replace the dummy text with your heading and banner graphic, adjusting the width of the columns as appropriate:

- Test to make sure everything works as you expect. Be sure to test on a mobile device, or use our inbox preview tool.
Can I add a background image instead of having one block colour?
Yes, but you should be aware that it isn't supported in all email clients (i.e. Outlook Desktop).
To do so, you need to amend the HTML. Here's how:
- Edit the HTML of the container block (use the "Up a Level" and "Down a Level" buttons if needs be):
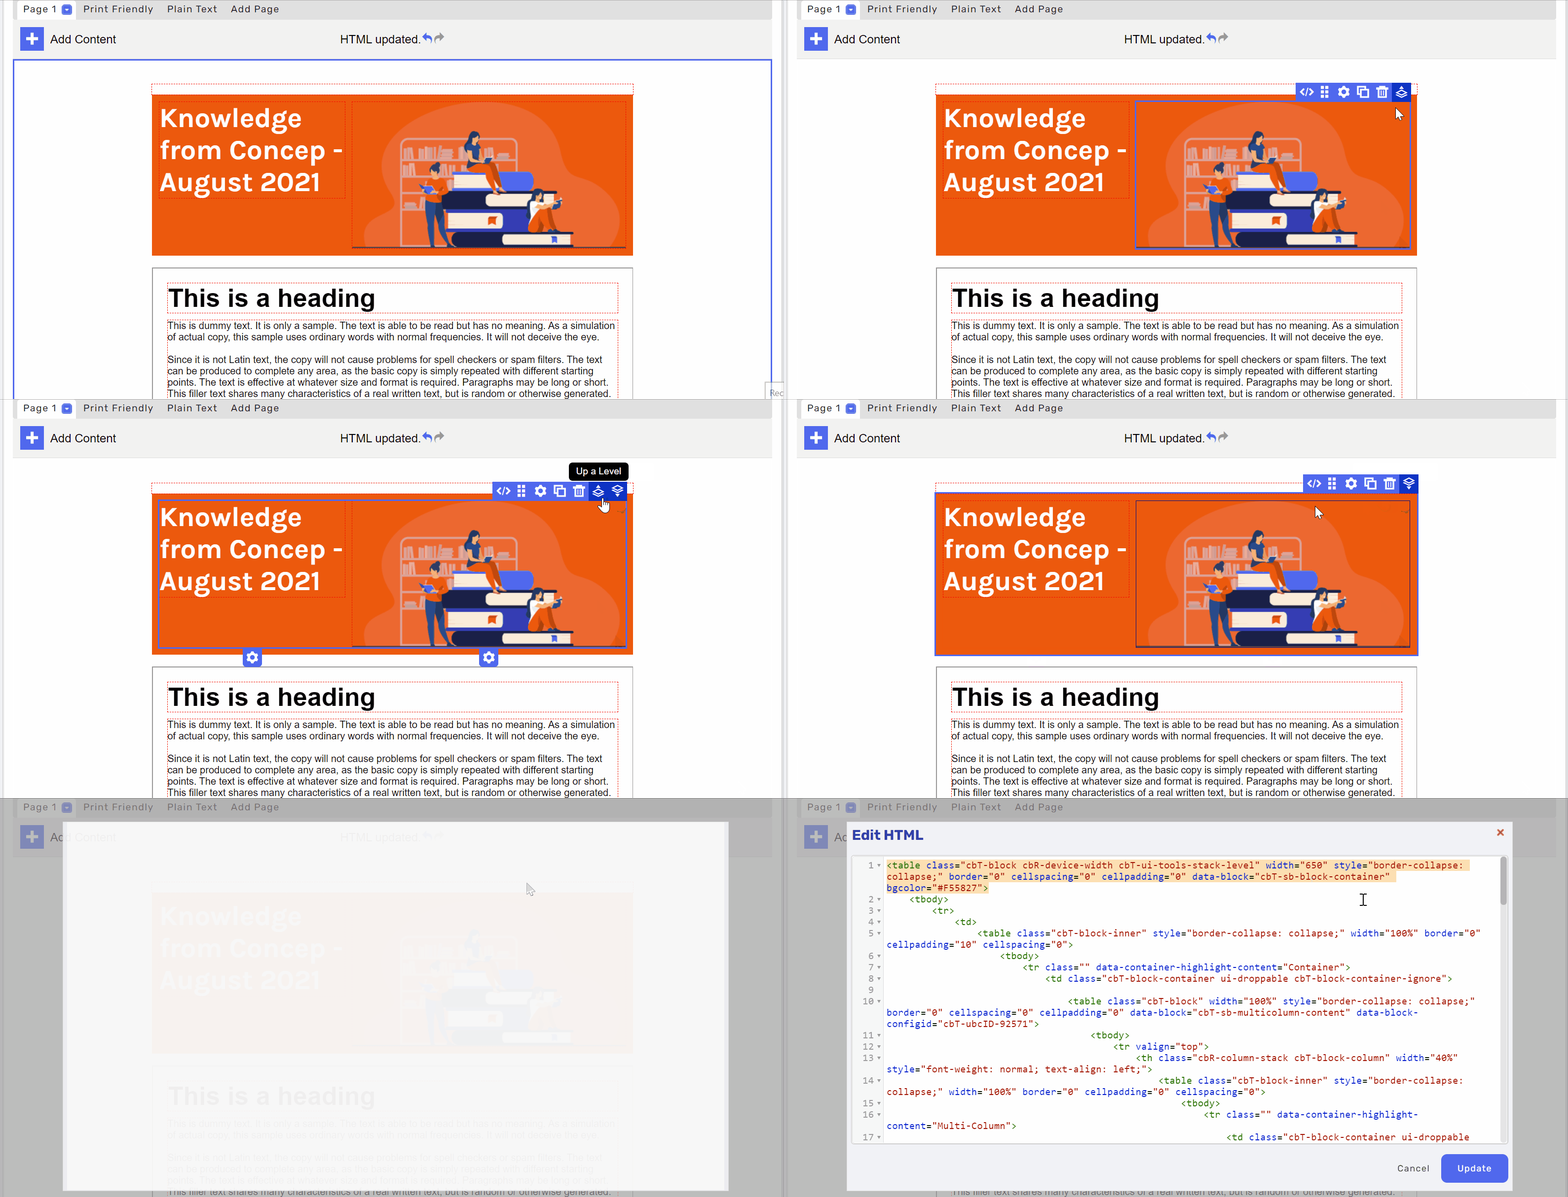
- Paste the following snippet into the style attribute on line one, replacing [insert image url] with the URL of your background image:
background-image:url([insert image url])
It should look something like this:
- Click Update. Your background image should display in the builder:

- To ensure your email campaign still renders well in inboxes where background images are not supported, we highly recommend setting a fallback background colour which every email client will default to. This is also the background that will display before a recipient downloads images.
To include a backup colour option, add the following snippet at the end of the <table> tag in line 1:bgcolor="[hex code]"
Here's a screenshot for guidance:
Should you run into any issues when setting this up, please feel free to contact our helpdesk at helpdesk@concep.com who will be happy to assist you.

Comments
0 comments
Please sign in to leave a comment.