
To add color options, you will need to create a selector in the HTML of the block.
First, select Edit HTML on the desired content block.
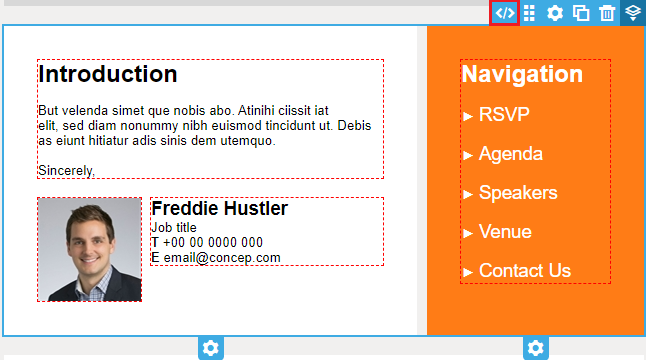
When you open the HTML, it should look like this.
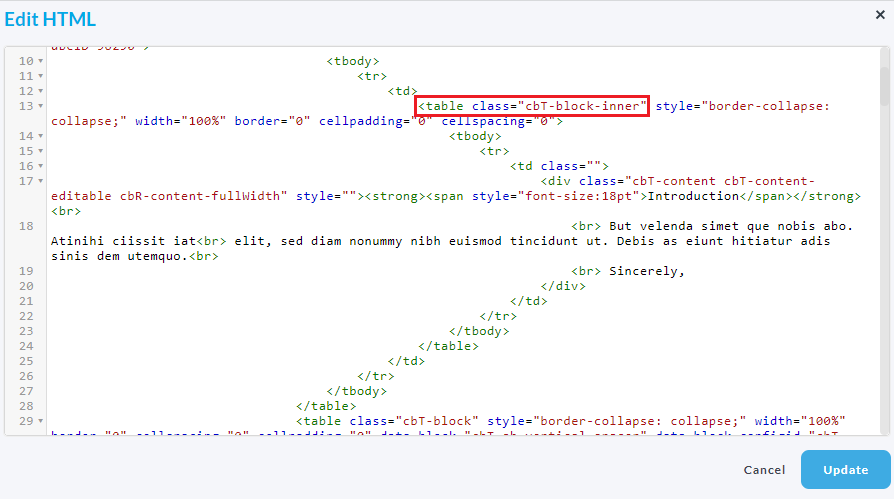
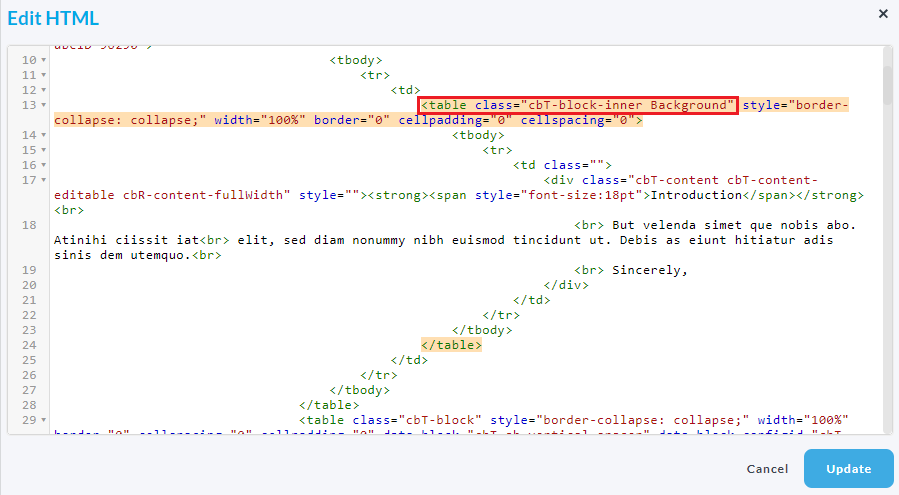
For the HTML to identify a change, enter a name (e.g. Background) in the class of the HTML. Then press update. This name will be used for the selector later on.
Then, navigate to the Settings cog.
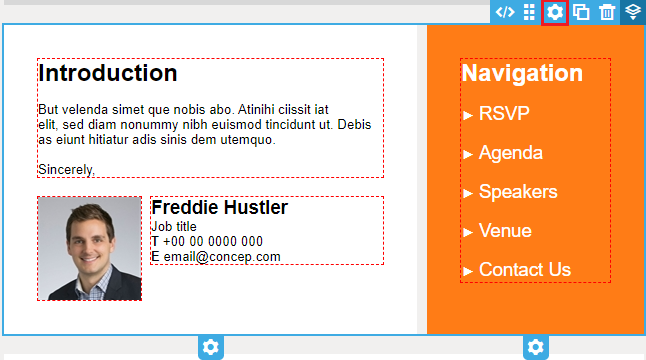
This opens the Content Block Settings on the right hand side of the template.
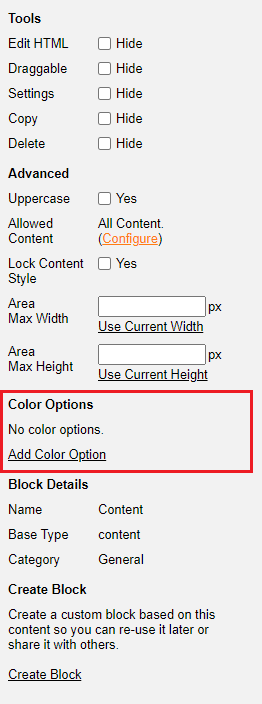
Select Add Color Option
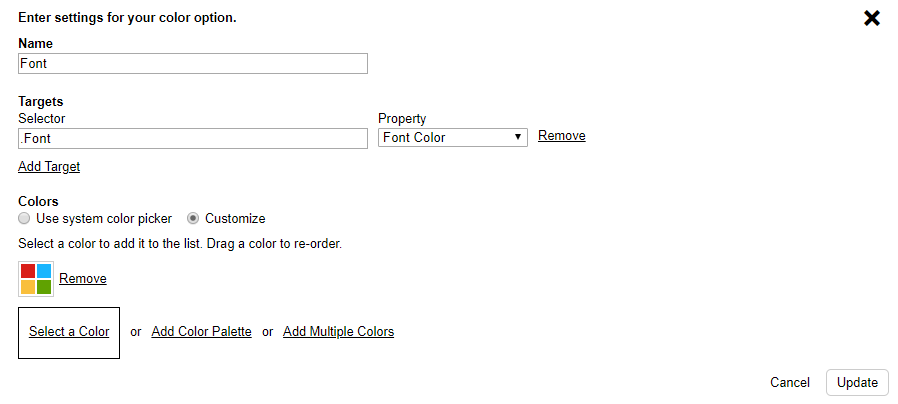
Enter a name and a selector. A selector is the word that you entered in the class preceded by a full stop. In this case, it is .Background.
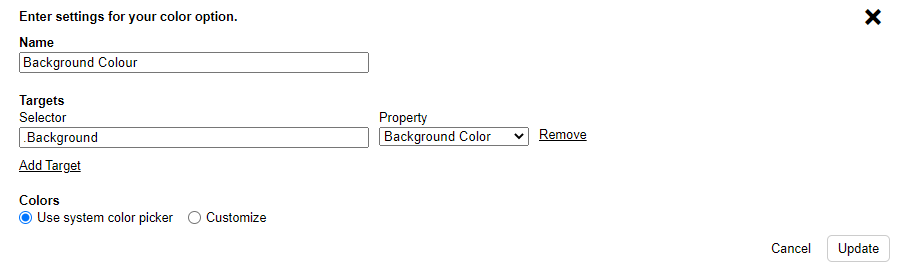
Now, select the Property.
This gives you the option to customise the font, border or background color of a content block in the template.
This example shows how to add a background color.
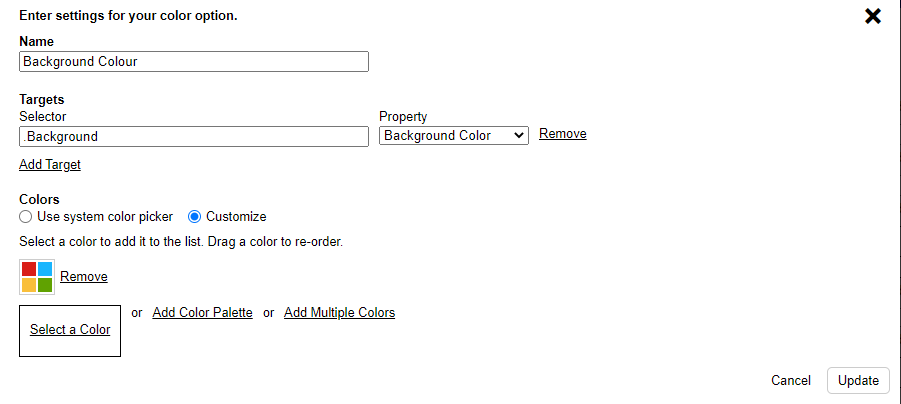
This will then give you the option to Select a Color, Add Color Palette or Add Multiple Colors.
Then press Update.
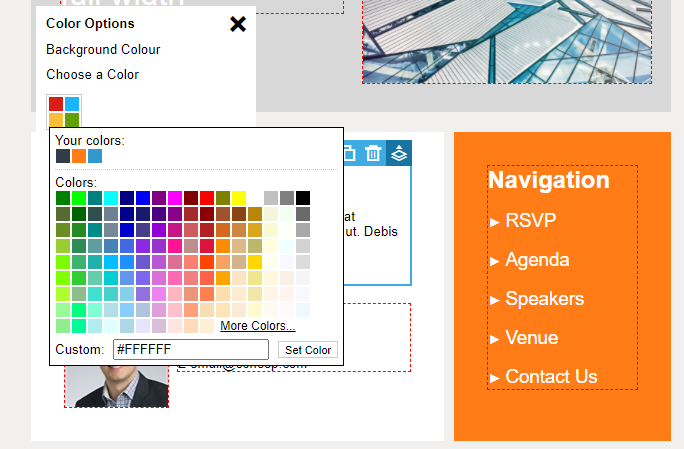
Navigate to the designated content block and click the dropper icon

Click on the desired color then select Set Color.
This feature is also available for font and border colors.
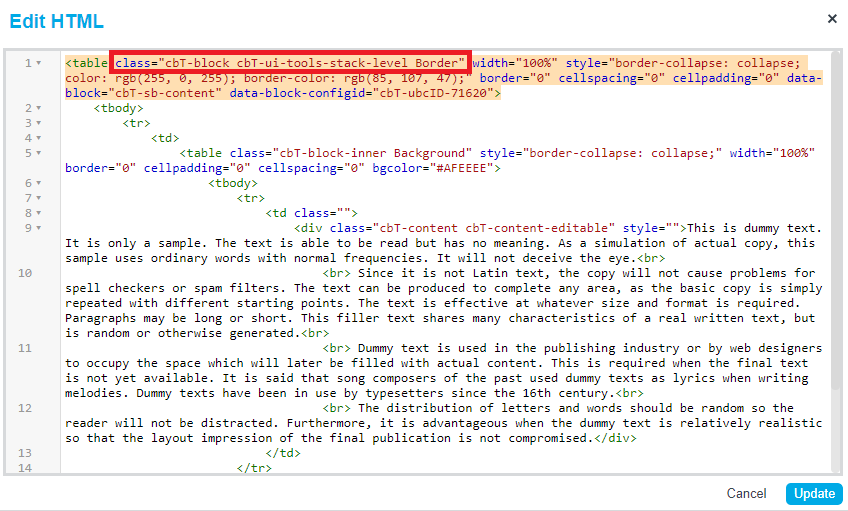
To add a border color, the selector must be in the first class of the HTML.
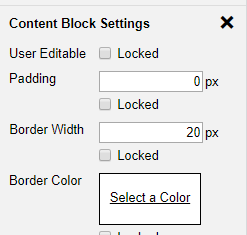
Note: Remember to increase width of border in the Content Block Settings.
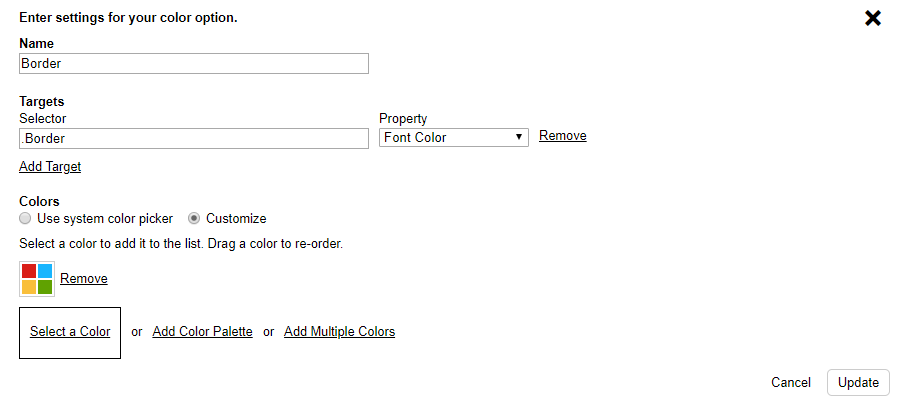
Then continue the same as adding a background color.
Note: the name and selector must be different for each property.
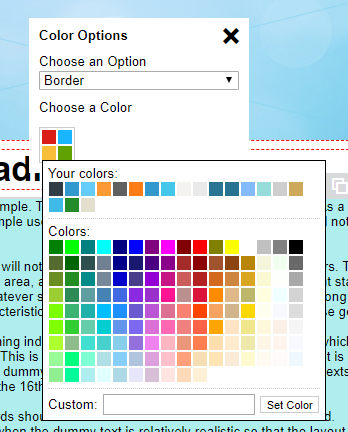
Click the drop down arrow of Choose an Option, and select border.
The border will look something like this.

To add a Font Color, the selector is added into the second class, like with the background color.
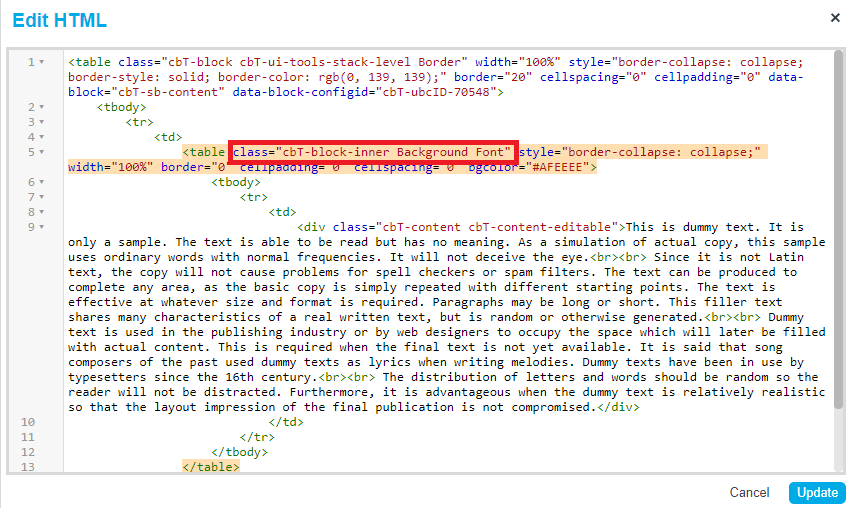
Continue with the same steps as adding a background color.
This is how the final font will look.
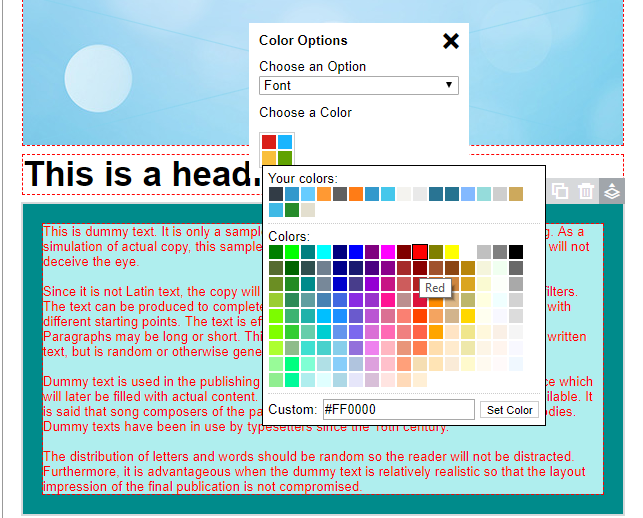

You can Add a Color Palette with your company's colours for a more customised campaign.
Comments
0 comments
Please sign in to leave a comment.