
Rendering issues? No embedded tables!
To ensure flexible and well behaved formatting across email recipients we advise using tables for structuring your layout and shaping your content. For example, you could insert images within a table so that text can wrap around the image.
It is important to keep Template designs simple, and not nest too many tables within each other. This is because inserting tables within further tables can lead to Campaign rendering issues in your recipient's mailbox.
Here you can see there are many dark grey lines around the table - this is the tell-tale sign that there are multiple tables embedded. This is a recipe for disaster, as the mail clients (Outlook, etc.) will put code into all of those extra spaces which can make images appear in a completely different place and mess up the text's formatting.
Expanding/contracting tables
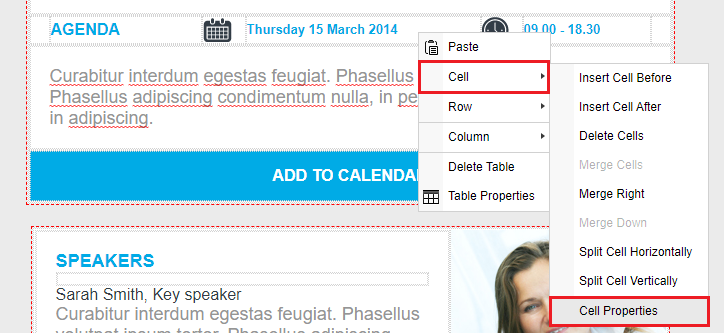
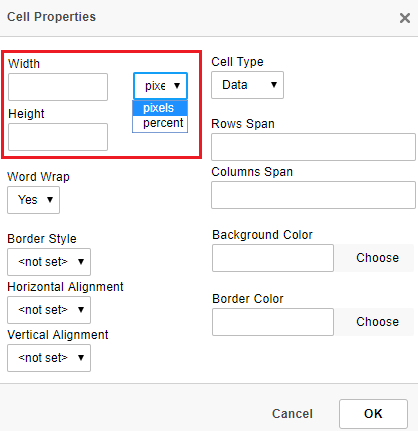
To ensure a table fits the content area, right click and remove the fixed sizing (pixel or percentage) that has been applied to the table or cell. To get to the Cell Properties, right click the cell/table and select Cell Properties or Table Properties dependant on which one you'd like to edit.
Removing the Width and Height will allow the table to expand/contract when needed.
Positioning images within a table
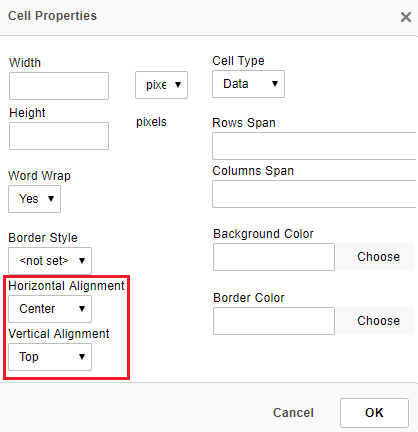
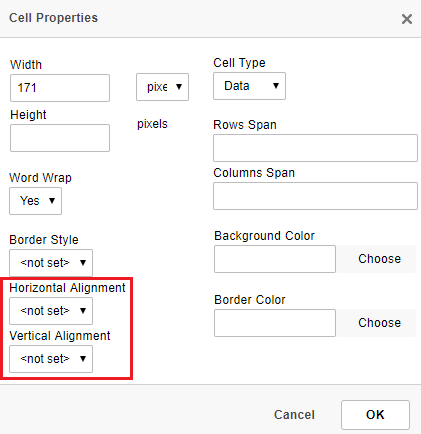
Inserting images within tables allows for greater flexibility with positioning. Right click on the cell that your image is in, click cell properties and align by Horizontal Alignment or Vertical Alignment.
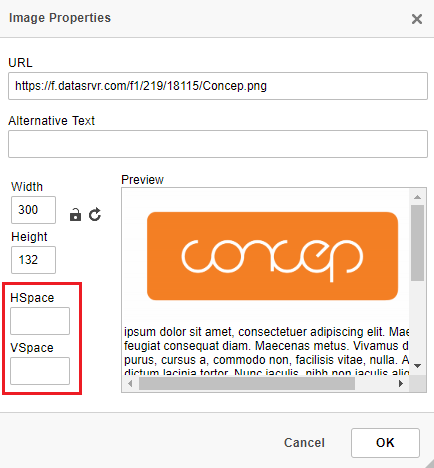
You can also add in extra space around your image by double clicking into it and inserting a value in the HSpace and VSpace entities.
Or (and this is my favourite way) you can right click on the individual cell that the image is in > go to cell properties > then adjust either horizontal or vertical alignment or both!
Perfect bullet points
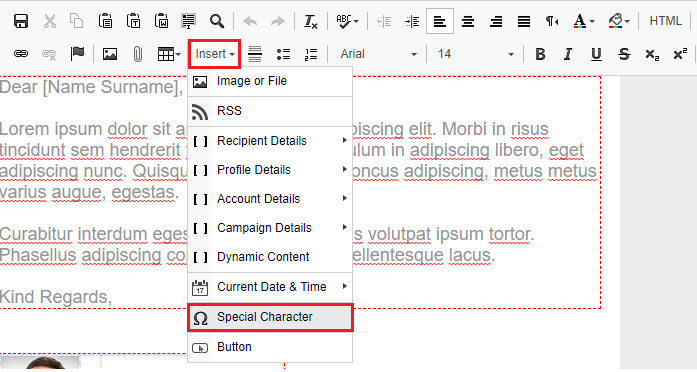
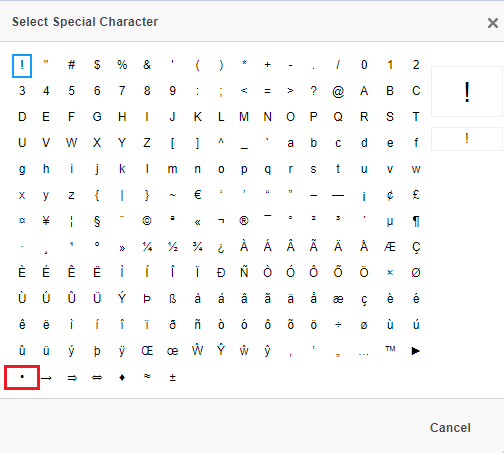
Some email clients/browsers render bullet points differently. To ensure bullet points appear correctly, create them using Special Characters and inserting them within a table to keep their structure.
Once you've inserted a table and formatted it to your specifications click on Special Characters icon which gives you a set of icons you can insert.
Adding images to Surveys
When creating Surveys you might want to personalise them by adding images. The best way to do this is to insert a table and then upload the image into a cell.
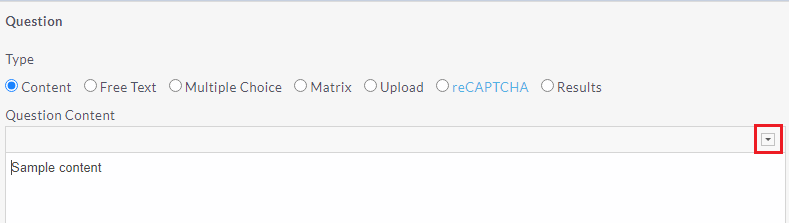
Firstly select the Content question and then navigate to the Expand Toolbar option on the right hand side.
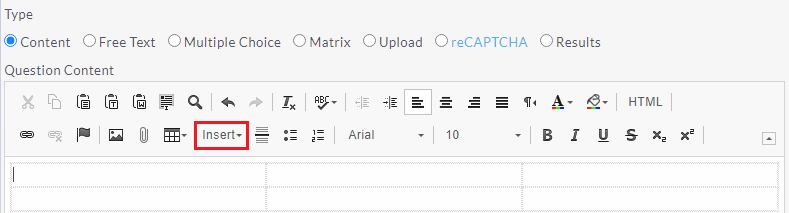
You then insert the table you want using the icon below:

After inserting a table select the cell you want the image to appear in and click the Insert tab. Then click on the Image or File button and select the image.
Creating a table with HTML
When creating your own HTML email content, here are several design tips and recommendations:
- Set the width in each cell (not the table) in pixels (not percentages).
- Avoid spacer images and stick to fixed cell widths.
- Nest tables; do not rely on left and right margins or padding for table cells.
- Avoid unnecessary white space in table cells.
- Use a container table for body background colours.
Using tables to ensure stability and correct rendering
A lot of email clients do not have the rendering engines capable of rendering complex visual layouts which are now constructed in HTML. Web browsers have improved their technology to keep up with the evolving HTML and CSS specifications however, email clients have not. This means that visual layouts must be constructed in tables to help them keep their structure and render properly.
Furthermore each of the large email clients such as Outlook have their own rendering engines. This means that special attention must be paid to specific types of content to ensure compatibility especially with Outlook 2007/2010.
For instance when designing content in Outlook tables or images longer than 1700 pixels in height (can result in strange gaps and spaces because Outlook inserts a page break).
Wrapping text around an image
Usually you will use a table to put in employee/partner profiles, but sometimes you will want to keep them in the same cell to wrap them with the text.
To wrap the image, you'll need to click the image itself so it's highlighted blue, then click where you'd like it to align.
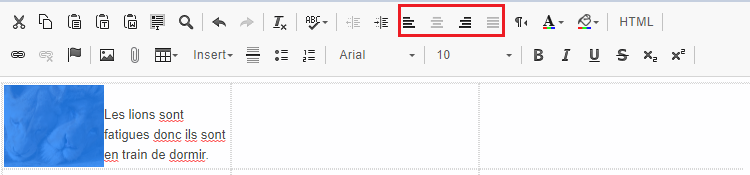
You will see the difference in these three stages: stage 1 - before wrapping, stage 2 - wrapping to the right, stage 3 - wrapping to the left

Comments
0 comments
Please sign in to leave a comment.