
Best practice when tailoring each Campaign to specific demographics.
Dynamic Content (DC) is a great way to send out personalised emails to different demographics, without having to do much of the leg work.
Send’s Dynamic Content allows the user to make Campaigns more engaging by changing content depending on the relevance to each reader. After the initial set up, sending out Campaigns using Dynamic Content is a breeze!
| I. | How it works |
| II. | Prerequisites |
| III. | Creating Dynamic Content tags |
| IV. | Sending |
How it works
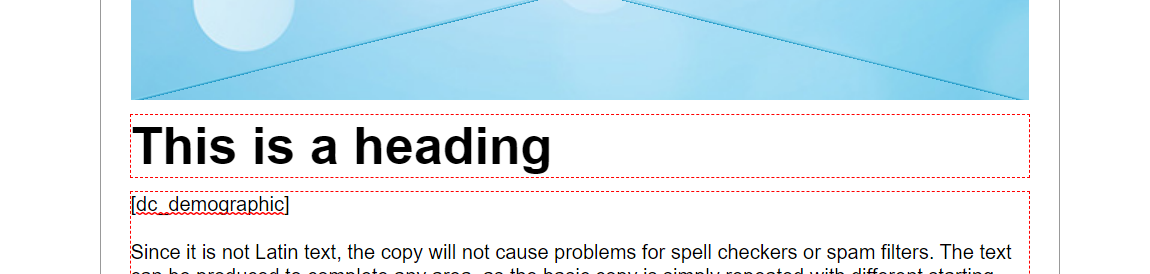
Please note that the Dynamic Content cannot exceed 5000 characters for each condition.
Dynamic Content works pretty similarly to how a Mail Merge does, but with a bit more to it!
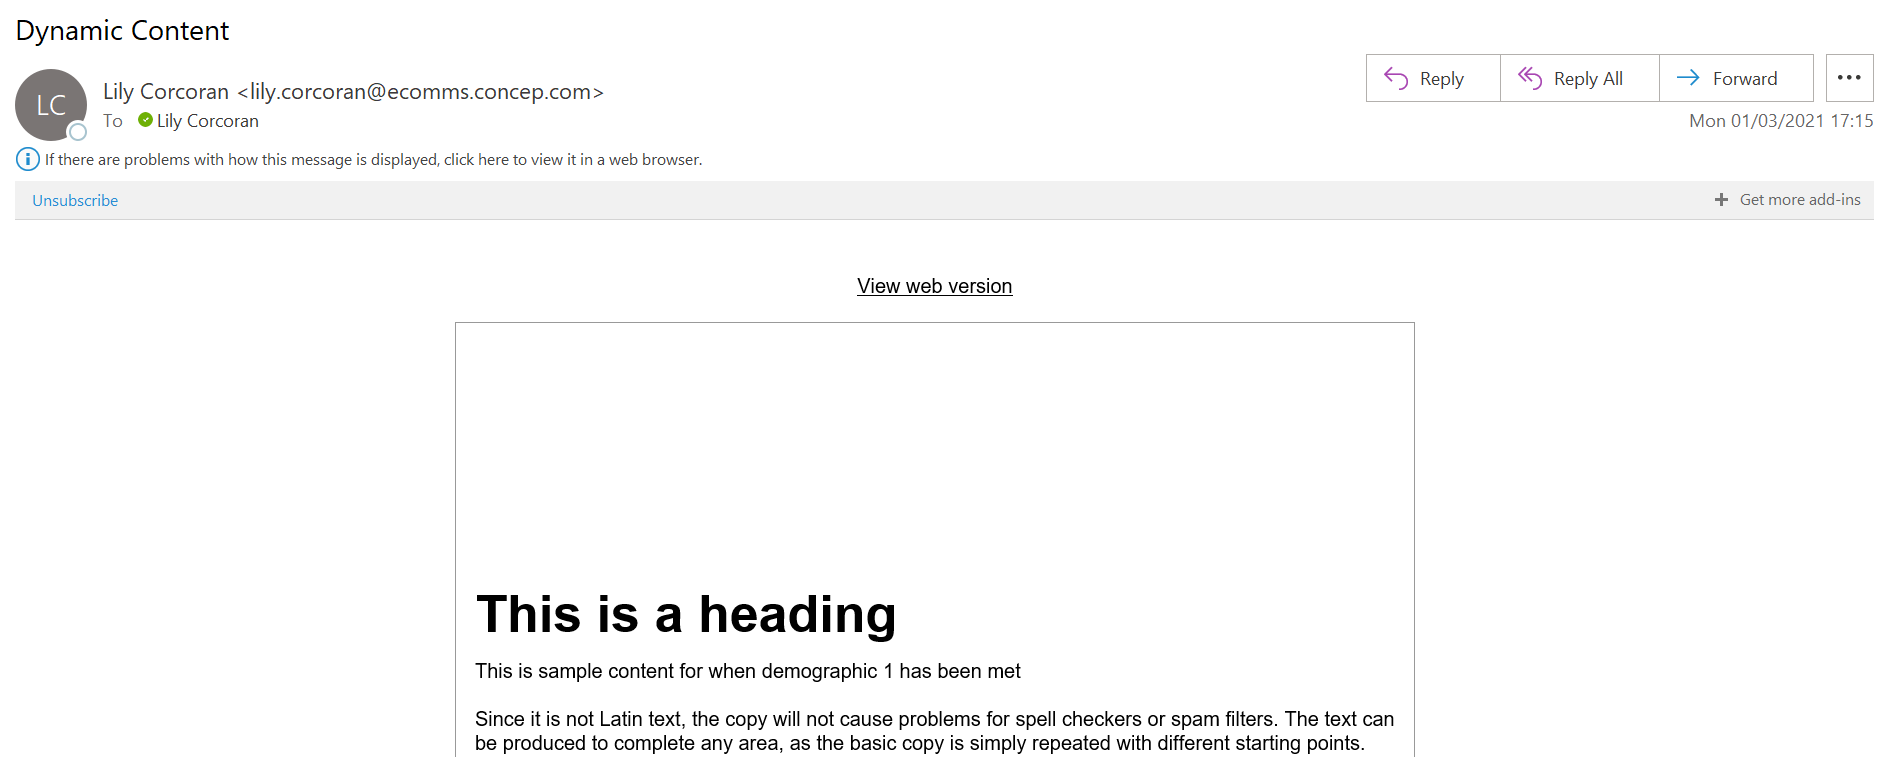
In short, Dynamic Content works off a contact or custom field allowing you to insert customisable and personalised content dependant on whether or not the recipient hits specific conditions. For example, if you have a contact John Doe who has a custom field stating they fall under Demographic two, they will receive a customisable Campaign with personalised content tailored to Demographic two.
We also see clients utilising Dynamic Content to send out one Campaign in multiple languages. This way, you can send out multiple Campaigns with different content, but still keep them all contained in the same report. This makes it much easier to get your stats all in one place instead of having to combine reports.
Prerequisites
To get you started, you will need to have a relevant custom field set up to link the Dynamic Content to.
Navigate to Contacts from the Home menu > Click the Advanced drop down menu > Select Manage Custom Fields > Add field > Create a custom field (Whichever type suits your use) > Add.
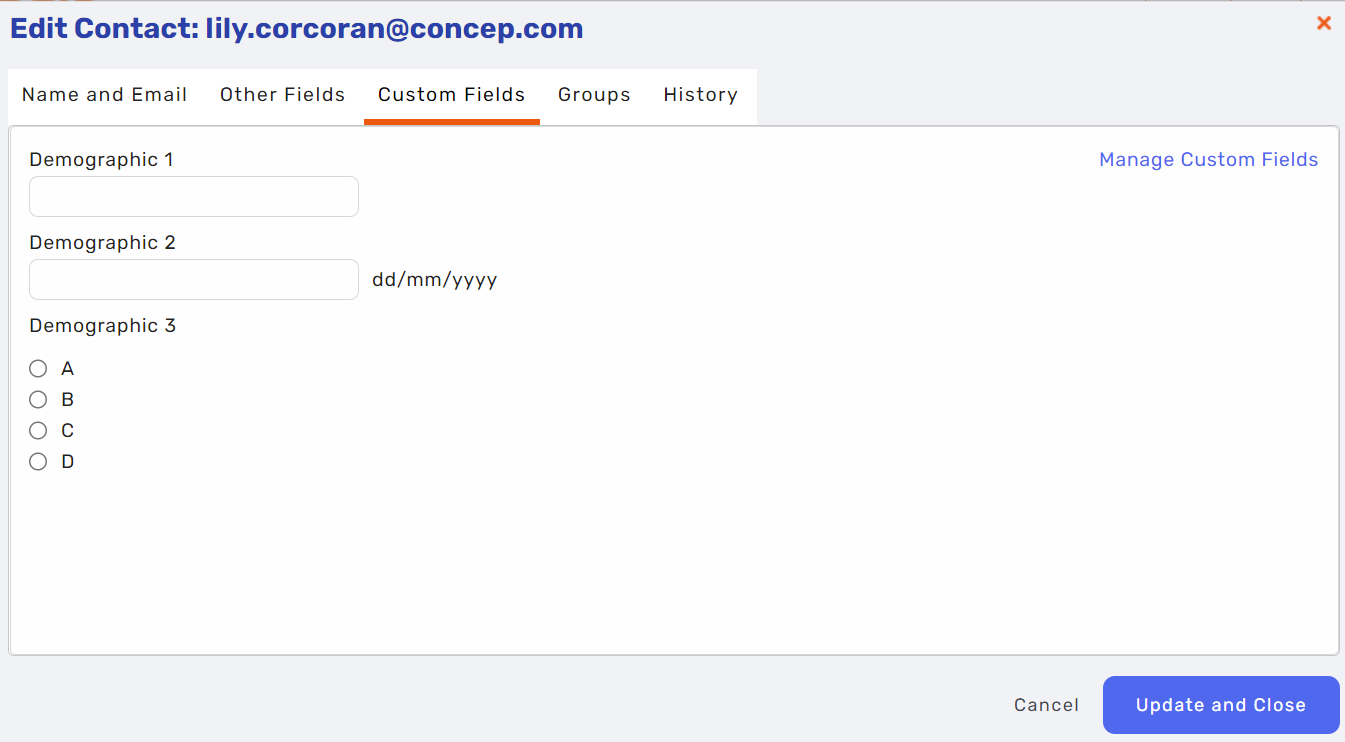
Note: If creating Dynamic Content for different demographics, I would suggest to create a Multiple Choice custom field.
Creating Dynamic Content tags
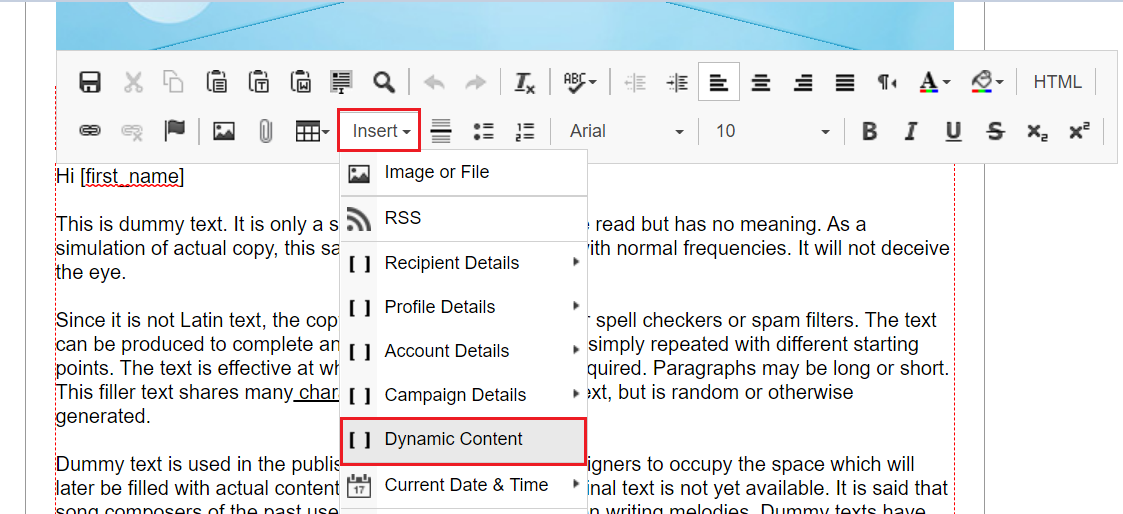
Once you are all set up with the relevant custom fields, it's time to go back into your Campaign and create the tags.
Click into the content of the Campaign and when the toolbar pops up, click into Insert > Dynamic Content > Add Tag
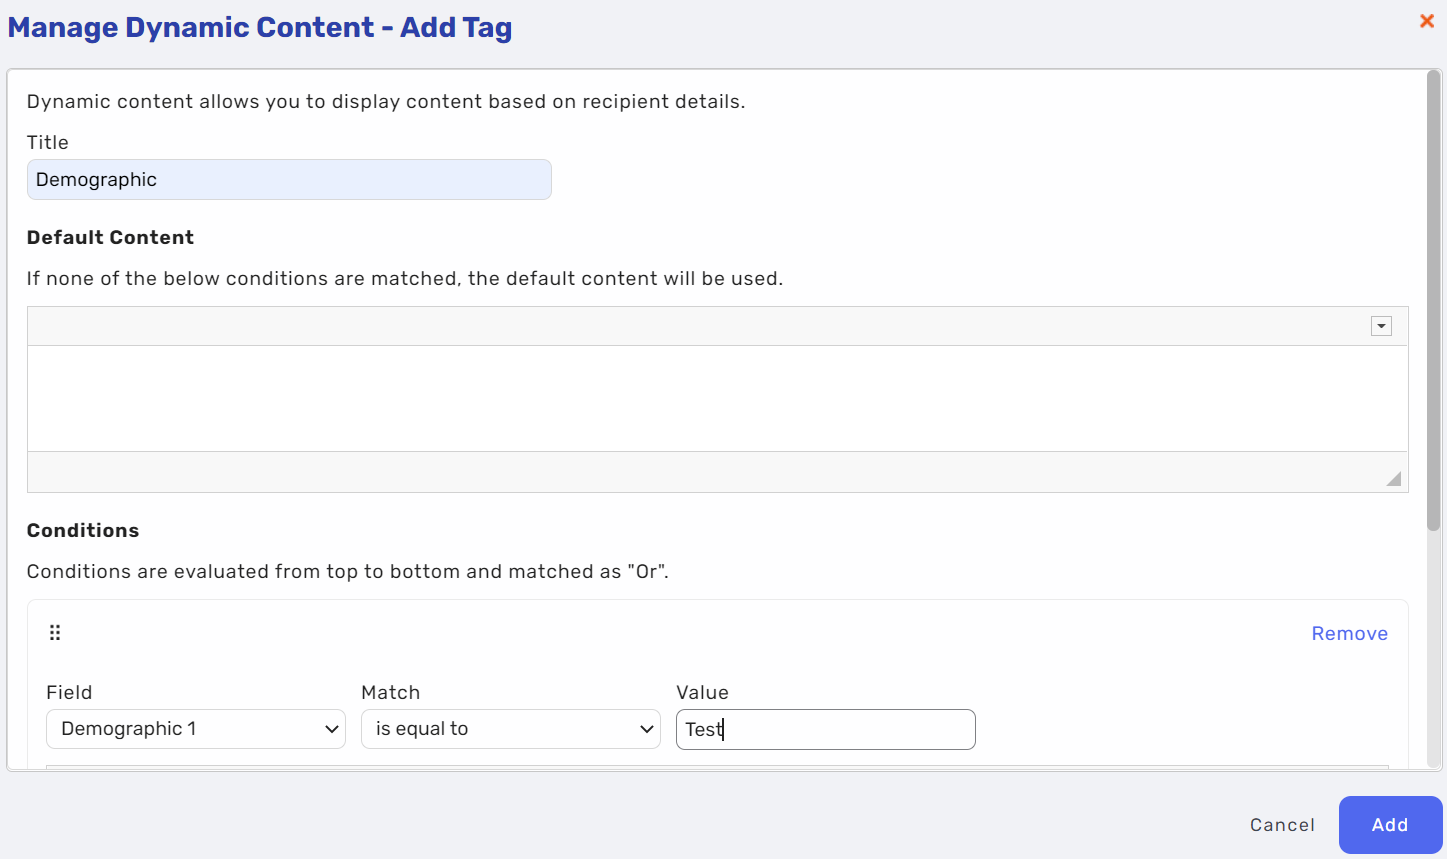
This will open up the editor for your tag, which has three main areas: Title, Default Content and Conditions. You will need to title your tag dependant on the use, most commonly we will see demographics and languages but you can use Dynamic Content for anything.
Enter a title for your tag, make sure you have a generic or default piece of content put under Default Content, then set your conditions to meet the corresponding contact or custom field. Once you have finished, click Add, then you can either use the tag from here or insert it into your Campaign manually.
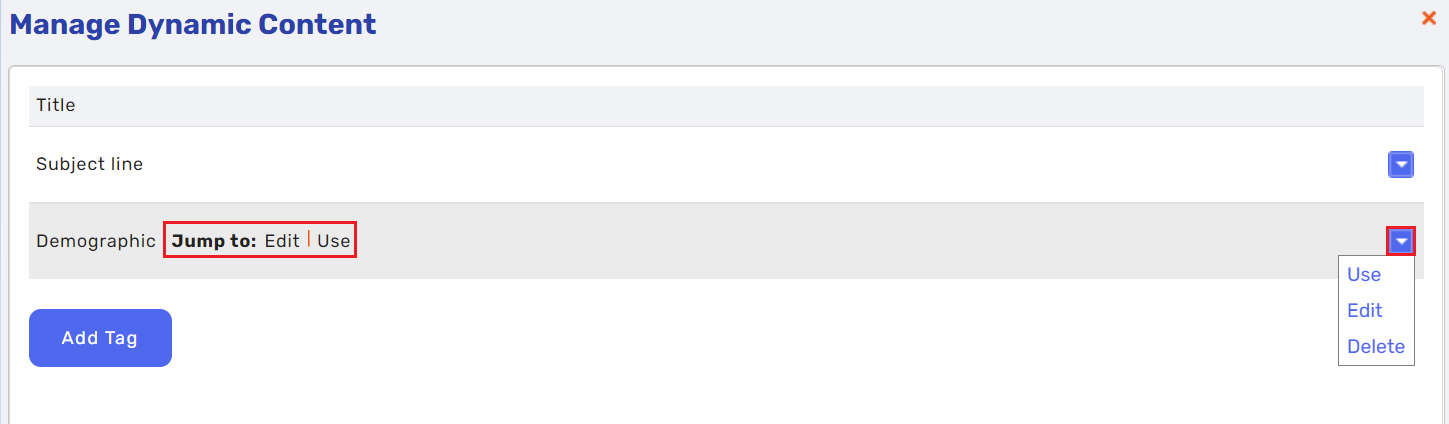
Once inserted, your tag will look like a mail merge, but will have 'dc' in front of it to signal Dynamic Content.
Sending it out
Now you are all set and all your tags are inserted into your Campaign, it's time to send it out to your recipients.
Warning! Make sure all of your contacts have their custom or contact fields filled in, otherwise the content will not pull through. To double check the DC is working, in the Preview and Send section, click through Recipient Preview or Select Recipient to see what the Campaign will look like in their inbox.
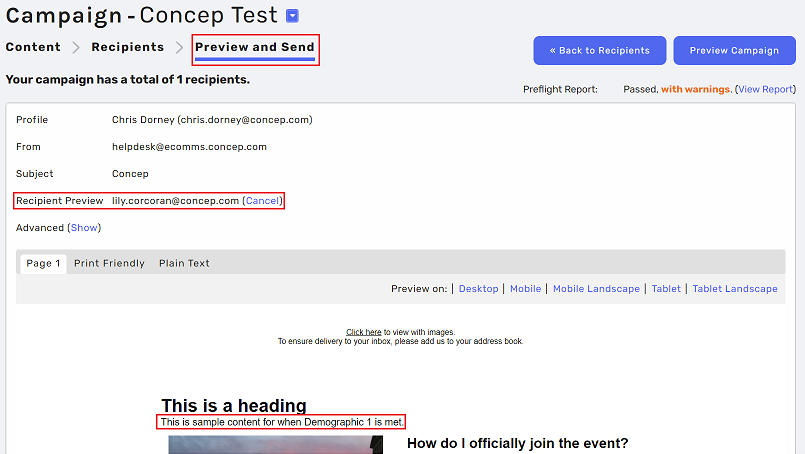
Once you have sent it out and the recipient has met the corresponding demographic, the tag will be replaced with your content.
Once you've sent the campaign, head over to the Reports tab to see the interaction and traction your Campaign is getting.
Comments
0 comments
Please sign in to leave a comment.