All good rendering campaigns need a solid back bone, which is why we always recommend having a good Template to base your campaign off of.
Not sure on how to build one? You can see the building blocks here, or you can contact our Delivery Services team to get one made up for you.
| I. | Mail Merge |
| II. | Reply Management |
| III. | Blocks and Tables |
| IV. | Image Properties |
| V. | Forward to a friend |
| VI. | Special Characters |
| VII. | Buttons |
Mail Merge
Mail merges allow you to create a more personalised campaign for each recipient. This can be within the Subject line or within the body of the campaign.
In the Subject line you click the drop down menu and pull specific information from your contacts list data. For example you can personalise your communication to the individual by directing it to the recipient i.e. for “Welcome Chris” you would select the mail merge [first_name] so the subject field reads: “Welcome [first_name]”.

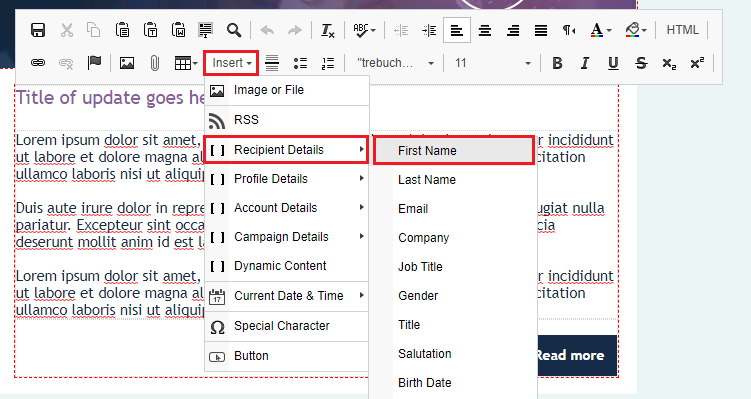
Mail merges can also be placed within the body of the campaign. The different mail merges are found here. They are inserted this way:
Reply Management
Click 'Show' next to Advanced to reveal the Reply Management settings.
Here you can select multiple options including sending replies to the profile email address which we discussed earlier.
Or you can select to send replies to one or multiple email addresses by typing them in the box provided.

You can also prevent out of office and other automated replies by selecting the box. This can also be used for new campaigns in the specific account by navigating to the setting tab, typing in replies in the search box and turning it on/off in the out of office/automated replies row.


Blocks and Tables
Similarly to the Template builder, when building a Drag & Drop campaign you can create new sections completely from scratch.
There are best practices when using these blocks which will reduce the chances of campaigns rendering incorrectly.
When editing Multi-Column blocks within a campaign, the columns should never be deleted to leave only one column. Instead of doing this, a single Content block should be added instead.

Within Multi-column and Content blocks it is always best practice to use tables to separate out words, buttons, images and special characters. Doing this will always lead to better rendering in a final send.
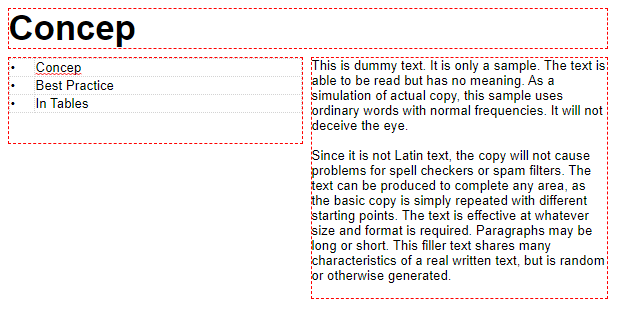
Image blocks should always be used inside of Multi-columns so they aren't effected by wording. If they are put into a Content block, tables are a good way of separating the wording from the image. Here is an example of using a Multi-column:

Image Properties
Some images can cause issues when uploading if they have not been designed for the Web. The optimum properties for an image used in Send are:
- No larger than 650/700px (pixel width)
- No bigger than 400KB (size)
- A resolution of at least 70 dpi
For more information on how to manually and auto resize images click here
To resize/edit images the optimum process is to edit prior to importing or do so within the Content section. Resizing in the Template or using the drag function can cause the image to render in an unintended size.
To resize an image, go into your campaign and double click the image. To edit the Height and Width click the padlock to make it editable. Then readjust your Width and Height to your preferred size. Having the padlock closed means it will auto size the image to fit the campaign.
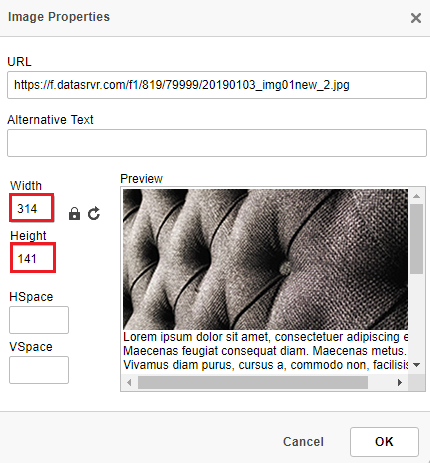
Resizing in the Content library can be done here:
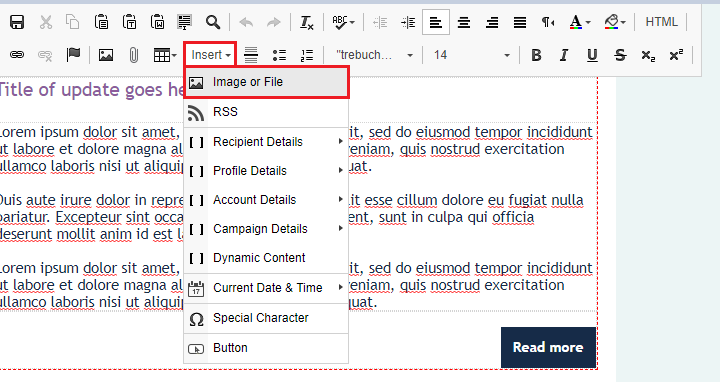

Alternatively, within an image block, click into the Settings icon and edit within the toolbar.
Forward to a friend
When you forward an email, the mail client will make changes to the HTML. This can include stripping out certain HTML elements, wrapping your email in a blockquote, or inserting additional classes to the code. These changes directly affect the look of the campaign and so can distort images, duplicate buttons, delete buttons, break images and unlink sources.
You are also not going to have access to the correct statistics from a forwarded campaign, as it will just pull up against the original recipient which will skew your reporting.
Instead, if a recipient clicks on a Forward to a Friend link/icon in a campaign they receive, it will be tracked in the campaign's reporting under the Interaction tab > Forwards. For security and privacy purposes, we do not track who they forwarded it to. If the individual they forwarded the campaign to, clicks on the link to view the campaign, these will be counted as a part of the total views statistic.
If a recipient clicks on Forward in their email program (e.g. Microsoft Outlook, Gmail, Yahoo, etc.), this is not directly tracked in reporting. However, in this case, additional views of that campaign (whether by the original recipient or by those they forwarded to) will be counted as a part of the total views statistic.
To create a Forward to a Friend link you will need to highlight the text/icon you wish to use or place the cursor where you wish to add Forward to a Friend link > select the link button  > Click on the Other tab > Select Create Link to Forward to a Friend
Special Characters
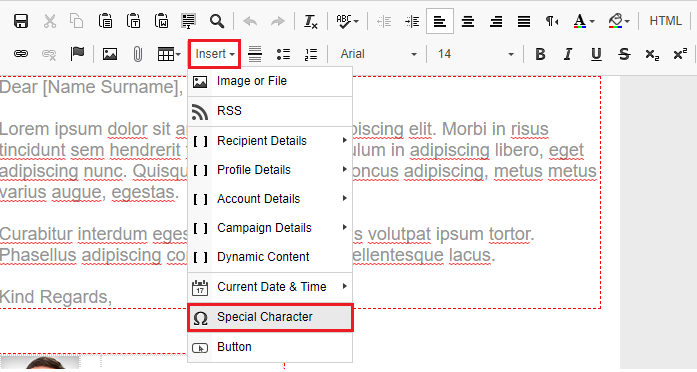
When using bullet points or any other special character they should always be added by clicking Insert > Special Character instead of using the bullet point icon within the toolbar. Once again, the safest option is to place these inside a table to ensure they render correctly within campaigns.
Buttons
Buttons should always be created using the Insert > Button option rather than creating a link from a word. This allows for extra customisation and ensures the campaign renders correctly when sent.

Comments
0 comments
Please sign in to leave a comment.