
Creating a Survey
Questions Types
Pages
Settings and Restrictions
Theme
Surveys are a great tool when creating an event workflow, sharing allow list instructions or simply signing up to a newsletter or communication.
Surveys also work well in conjunction to Campaigns, as all clicks from the Campaign are filtered into the Survey reporting, as well as attaching contact details to their responses.
To get started on creating your Survey, navigate to the Surveys tab in the main navigation menu, click Create a Survey and insert a name.
You'll be redirected to the Content stage of your Survey where you can add, edit and delete questions and pages.
Question Types
When you create a Survey, the different question types available can be accessed by either clicking into the question, where you can easily change the type of it by simply selecting a different one. Or alternatively, you can drag in any question type from the left hand side.
Questions types available:
- Content
- Free text
- Multiple Choice
- Matrix
- File Upload
- reCAPTCHA
- Results
Please note all question types will have a toolbar where you can do a multitude of things such as format text, insert files or images and insert tables. To access the toolbar, click into the question content and select the drop down arrow.
Content
The content question type allows you to enter text and/or images to display in your survey. Usually this question type is used to introduce the survey, or give some sort of context or introduction to the form. Please note that these question type does not collect any data from the responders.
Free text
Free text questions allow your responders to enter in their own text-based answers to questions. From here you can type in your question, and you also have the option to add in helper text to give the responder more context. i.e Question Content: Date of Birth Helper Text: DD/MM/YY
For additional options, navigate to Settings and click Show.
- Style – From here you will be able to select the vertical size of the question field (single line or multi line) or set the field to show answers as a password.
- Size – This option will allow you to determine the width of the input field box (large, medium or small).
- Limit Answer Length To – Use this option to set a maximum number of characters for your respondents answer.
- Restrict Answer To –Set if responders must answer with an email address, URL, date, number or specific item from a list.
- Auto Populate With (only available when the survey is deployed using Create Link
from Campaign) – You will be able to auto populate/pre fill answer fields with specific fields from your contact dependant on which option you choose i.e First Name, Last Name, Company etc. - Default Answer – Designate a specific value to pre-fill the answer.
- Mandatory – Allows you to make sure the question is answered before the respondent is able to submit the survey.
- Hidden – Hides the question from responders’ view (answers already received to the question will still be correctly shown and reflected in the survey responses).
- Encrypt - You can find more information here.
Multiple Choice
Multiple choice questions, as the name suggests, allows multiple options for the respondents to choose from.
This is similar to Content and Free Text in the way you have the Question Content and Helper Text. Where it varies is the Multiple Choice will also have an Answers field, where you can input multiple choices.
Configure answer choices:
- Use the input field box under Answers to enter the answer choices for the multiple choice question.
- Click Add Answer to add additional answer choices.
- Click Delete to remove an answer choice.
- Click and drag the 6 dots icon to reorder answer choices.
- Check the box next to Hide to remove an answer choice from view but retain responses already recorded.
- Use the If chosen, go to: drop down menu for surveys with multiple paths, so you can redirect responders to a specific page based on their answer to this question.
By clicking 'Show' next to the Settings you will be able to access additional options:
- Allow 'Other' Answer – Adds on an extra 'Other? (Please specify)' question.
- Allow Multiple Answers – Allows respondents to tick multiple answers.
- Display – You'll have four options to pick from of how you'd like your question to be laid out: Vertical List, Horizontal List, Drop Down Menu, Rating scale or Images
- Mandatory – the question will be a required item that your responders must complete in order to submit the survey.
- Hidden – This function will hide the question from your responders view.
- Encrypt - You can find more information here.
Matrix
Matrix questions allow responders to enter answers for multiple categories along a scale of
options.
This question type is useful in customer satisfaction and performance ratings.
By clicking the Show text next to the Settings tab you will get access to additional options:
• Allow Multiple Answers Per Row – From here, you can determine if your responders will able to select more than one answer per row.
• Mandatory – Set the question as a required item that responders must complete before they can submit the survey.
• Hidden – This function will hide the question from your responders view.
Once you have made your necessary changes the matrix question should appear as shown below.
File Upload
You can add in a File Upload question type, which allows the responder to upload a document, such as a spreadsheet, a PDF or an image.
When you’ve added in a File Upload question type, you can edit the question content and the text that appears on the button. Clicking Show, will open up various settings for the question, such as maximum file sizes, or limiting what type of file is uploaded.
The files uploaded using this questions can be found in Reports > Surveys. You can either click into individual responses, or export to an XLS or CSV file.
Please Note: Files will only be stored for 6 months after the date of the upload.
reCAPTCHA
reCAPTCHA questions are hosted by Google to give you a bit more authentication that there are no bots accessing your survey. It'll give your respondents a series of images with directions of what to pick, this question type is useful in preventing invalid survey responses.
You can add a title above the reCAPTCHA, or simply leave it blank if you'd like it to appear on its own.
Clicking into Show will allow you to customise the Size and Theme of the reCAPTCHA.
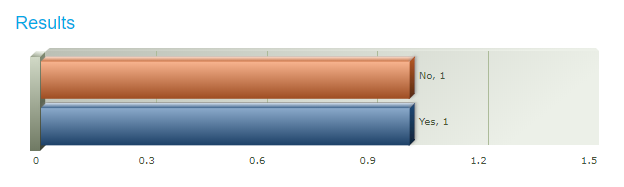
Results
The results question type gives you the option to display a graph of the answers to a multiple choice questions in your survey.
Similar to the Content question type, Results will not collect any data from your responders, only display data that has been previously entered. However, here is an example of what the results question will look like when data is entered.
Pages
Once all questions on a page have been added you can add further pages to your Survey if required.
Each survey must include a minimum of two pages – a page with the questions and a
confirmation page to display after a respondent has completed the survey.
By default, these two pages are pre-created for you and named Page 1 and Page 2.
Page Options
While in the Content step of a survey, click the Add Page text link to add an additional page
to the survey. Also, by clicking and drag the 6 dots icon you will be able to reorder the pages.
Click the drop down arrow next to a page’s name to access additional options:
Copy – From here you can copy the page, questions and any associated actions.
Rename – Enables you to rename the page i.e RVSP or Confirmation Page
Actions – This function will enable you to add an action to the page, which can trigger a multitude of things such as adding contacts, sending notification emails or sending campaigns. For more details on what actions are and how to set them up please click here.
Delete – Deletes the page and all questions
Settings and Restrictions
From the restrictions and settings tabs of your surveys you have the ability to control how your survey appear and the different functions available for you to use.
Settings
By clicking on the Settings tab, you will be able to edit your survey even further.
For example, Page Title allows you to modify the title that displays at the top of the browser window when the survey is being viewed.
Favicon will allow you to customise the icon that appears next to the page title when the survey is opened in a window or tab.
The Header option will allow you to add content that will appear at the top of every page in your survey.
Under the Progress Bar option you have the ability to display a progress bar (below the header) that shows a recipient how much of the survey they have completed.
Please note that if you wish to edit the colours of the progress bar you will need to navigate to Theme > Theme Builder > Progress.
Under the Buttons tab, you have the option to edit the text in the Next and Previous buttons in the survey.
From the Footer tab you are able to add content similar to the Header option that will instead appear at the bottom of every page in the survey.
Under the Multiple Responses function, you choose whether or not there can be multiple resposnes submitted per computer.
From the Edit Responses option you can control whether the responders are allowed to edit their previous responses at any time. Or, lock it down so that they're only allowed to edit until they complete or exit the survey or restrict it completely.
By selecting the Languages option you can add additional languages in order to create multiple versions of questions and answers. When you add additional languages, your responders will be able to select the language they'd like to view the survey in.
Restrictions
Clicking the Restriction tab will open up multiple sub tabs where you can lock down/restrict certain areas of your survey.
- Close Date - Allows you to set date and time in the future to stop allowing responders to input their answers. From here you can also edit the message that will appear when a recipient opens the survey after the close date.
- Maximum Responses - Allows you to specify the number of responses that will be accepted for the survey. You can restrict the total number of responses to a survey or you can select a specific question and answer combination to count towards the maximum responses restriction. You can also customise the error message that will display after the maximum number of responses have been received.
- Password Protection - This setting inserts a page before the survey where the respondent must enter a password to get access.
- IP Addresses - You can enter IP's here to either block them from accessing the survey or allow them access for those specific IP's.
Theme
Theme Builder
Once you're happy with the body of your Survey, you can move onto the Theme, where you can customise the appearance of your Survey.
You'll have three different tabs in front of you: General, Theme Builder and Customize.
General will provide you with preset themes, made by us which you can easily click through and have everything ready to go.
Theme Builder will give you more creative room to build out your theme as you'll have sections to customise such as the questions, buttons and page itself.
Lastly, you'll have Customize, if you have developers who can code up a theme for you with CSS then this is where you'll need to insert that.
After you've made the edits, click the Save and Continue to Deploy button.
Preview and Deploy
Now that your survey is ready to be completed, from the Preview and Deploy stage you can preview the survey you have created and check it in order to ensure it is formatted and presented as you had intended. To learn more, please click here.
Comments
0 comments
Please sign in to leave a comment.